Quantcast
Channel: Production Orders – Olof Simren – Microsoft Dynamics NAV Blog
Viewing all 17 articles
Browse latest View live

Create Production Order from Sales Order for Partial Quantity

$
0
0

Most of us know that you can create production orders from sales orders in Microsoft Dynamics NAV. When doing this the production orders are reserved against the sales order lines and they also inherits the dimensions from the sales order lines. The quantity on the production orders equals the base quantity on the sales order lines and the due dates of the production orders becomes the shipment dates backdated by the default safety lead time defined in the manufacturing setup.

For make-to-order environments this is great and creating the production orders from the sales orders quite often becomes the handover from sales to production.

But what about if there already are some items in inventory available that can be used to fulfill part of the ordered quantity?

If you for example sell 10 bicycles and there are already 3 in inventory, then you might only want to produce 7 new bicycles and use the 3 already in inventory to fulfill the order. The way to handle this is to first reserve the 3 bicycles in inventory against the sales order line and then afterwards go and create the production order. This way the production order is only created for 7 bicycles.

Here is how to do it:

A sales order for 10 bicycles is entered in Dynamics NAV.

SalesOrder

You can see in the fact box to the right that there are already some bicycles available in inventory (since you only missing 7) and decide to use those to fulfill the order by reserving them against the sales order line.

The way to reserve the 3 in inventory is to click Functions and Reserve…

Reserve

In the reservation page you will see the 3 as available Item Ledger Entries (e.g. on hand inventory) and by using the ‘Reserve from Current Line’ function you can reserve those against the sales order line.  The ‘Reserved Quantity’ then gets updated and you can see the rest in the ‘Unreserved Quantity’ field.

ReserveFromCurrentLine

On the sales order line you will see a total of 3 in the ‘Reserved Quantity’ field.

ShowsReservedQuantity

You have now reserved the 3 bicycles in inventory against the sales order line. The production order is then created for the remaining 7 bicycles using the Order Planning functionality.

OrderPlanning

On the sales order line you will see a total of 10 in the ‘Reserved Quantity’ field.

ReservedQuantity

When making a drill down in the ‘Reserved Quantity’ field you will see the reservation entries that shows you the 7 against a firm planned production order and the 3 against the item ledger entry.

ReservationEntries

From there you can navigate to the production order that is for the 7 bicycles.

ProductionOrder

That was basically it! If you don’t reserve the 3 bicycles before you create the production order Dynamics NAV will create it for 10 bicycles instead of 7.

The production then owns the process to produce the 7 bicycles and once it is in stock they will be shipped together with the 3 that came from inventory.

Olof Simren - Freelance Microsoft Dynamics NAV Expert


Production Order Posting to General Ledger

$
0
0

How Microsoft Dynamics NAV posts into the general ledger from production orders is something that you must know when implementing it in a manufacturing environment. It is critical in order to get the posting groups and their related accounts correctly defined.

This blog post will focus on the general ledger accounts and the amounts, for details about what dimensions that are used, see my previous post; Dimensions on Production Orders.

The examples that are described are using the expected cost posting (setup in the inventory setup), which to me is the preferred way to setup Dynamics NAV. Without the expected cost posting you don’t get a credit on the WIP account when you post the output, which is something that is typically required, especially if you have production orders that spans multiple days and sometimes accounting periods.

The activities on a production order in Dynamics NAV that can create general ledger entries are:

1. Posting of Consumption

2. Posting of Output

3. Posting of Output for Last Operation

4. Finishing Production Order

5. Invoicing Subcontracting Purchase Order

Of the above activities, all are optional except number 3 and 4 (yes, you don’t have to post any consumption, but it is very rare not to). I have included the subcontracting functionality to spice it up a bit :-) and make it complete, but obviously far from all production order will have subcontracting. In my example I describe what happens when you get the subcontracting invoice after the production order has been finished, which to me is common.

The examples below are all based on producing item 1100 – Front Wheel that is in a Cronus database for which I have added a subcontracting operation of $25 per piece.

Routing-in-Dynamics-NAV

When doing this type of exercise I prefer to post each of the activates on separate days, doing this will allow you to separate the g/l transactions by navigating using the posting date and to show all the g/l transactions on the production order by navigating without the posting date. I then send the g/l transactions to Excel and create a pivot table to show the net change by account; this is useful when looking at production orders with a large number of components and operations since it then becomes harder to do the math in your head.

The production order used in the examples below is for 10 PCS, the product being produced and all the components are all based on the standard costing method (which to me is by far the most common method for manufactured items in the US, while I in Europe have experience more use of the FIFO costing method).

1. Posting of Consumption

First we post the consumption of the components; we post an additional one of item 1150, so instead of 10 pcs we used 11 pcs (could be scrap for example). You see that Dynamics NAV separates the 10 pcs with the additional 1 pcs in the value entries even if the 11 pcs where posted together.

Consumption-Value-Entries-Dynamics-NAV

Navigate on any of the value entries, show the g/l entries, send them to Excel and do a pivot table and you see the net change by g/l account.

Consumtion-GL-Entries-Dynamics-NAV

As you can see, posting the consumption of components credits the inventory accounts and debits the WIP account. The amounts are according to the inventory value and the costing method being used (in this case standard costing).

The WIP account is based on the inventory posting group of the item being produced and the location for the consumption (defined through the inventory posting setup). And the inventory accounts are based on the inventory posting group for each of the components and the location for the consumption. In this case, apparently some of the components are classified as finished goods and some as raw material. Maybe not the most pedagogic way to describe this, but a common situation in the real world.

2. Posting of Output

Next we post output for the operations. In this example I start with posting operation 10 by entering a run time, setup time and output quantity. Then I receive the subcontracting purchase order, this completed operation 15. And last I also post output on operations 20, 30 and 40. The last operation I save for the next step since the last operation in a routing is a bit special and I think it deserves it’s own step..

This creates value entries according to below. Note that it is only the first operation that has capacity costs related to it, so we only get g/l entries for that one. Receiving a subcontracting purchase order completes the related operation but adds no costs to the production order.

Output-Value-Entries-Dynamics-NAV

Navigate on a value entry, show the g/l entries, send them to Excel and do a pivot table and you see the net change by g/l account.

Output-GL-Entries-Dynamics-NAV

As you can see, posting the output for an operation with some time credits the costs of capacity account in the P&L and debits the WIP account. The cost of capacity account is according to the direct cost applied account in the general posting setup for the general product posting group defined on the work center and a blank general business posting group and the WIP account is according to the inventory posting group for the item being produced and the blank location code (capacity transactions are with blank location codes, this is why you need at least one inventory posting setup record with a blank location code even if you setup Dynamics NAV with location code being mandatory). If there was overhead defined on the work center, you will also get a credit against the overhead applied account in the general posting setup.

The amount is according to the time entered and the cost defined on the work center card. Note that there is an option in the manufacturing setup to include or exclude the setup cost; most places would have it included.

The total net change in the general ledger for the production order is at this stage the following.

Total-Step-2-GL-Entries-Dynamics-NAV

3. Posting of Output for Last Operation

When we post the output on the last operation we get the finished product into inventory.
This creates value entries according to below. One value entry is for the time entered in this case without a cost (same as described in the previous step) and the other one is for the product that gets into inventory.

Output-Value-Entries-Last-Operation-Dynamics-NAV

Navigate on the value entry, show the g/l entries, send them to Excel and do a pivot table and you see the net change by g/l account.

Output-GL-Entries-Last-Operation-Dynamics-NAV

In addition to the transactions create by the time and cost (as for the previous operations described above) we also get a credit on the WIP account and a debit on the inventory account interim for the item being produced. The amount for this is according to the standard cost of the item if the standard costing method is used (like in our example), if on FIFO it will be according to the unit cost on the production order line which is considered an expected cost. The inventory interim account comes from the inventory posting setup for the inventory posting group defined on the item being produced and the location where the output is posted against.

The total net change in the general ledger for the production order is at this stage the following.

Total-Step-3-GL-Entries-Dynamics-NAV

4. Finishing of Production Order

Now we have posted the consumption of all components and outputs for each of the operations. The next step is then typically to change the status of the production order to finished. Changing the production order to finished triggers Dynamics NAV to calculate the actual costs of production which for a standard cost item will be used to determine and post the variances into the P&L and for a FIFO item it will be used to set the inventory value of the item. Note that the transactions in the general ledger are not created until you run the cost adjustment batch job (hopefully you know what that batch job is :-) ).
The following value entries were created when the production order was changed to finished.

Finish-Production-Order-Value-Entries-Dynamics-NAV

Navigate on the value entry, show the g/l entries, send them to Excel and do a pivot table and you see the net change by g/l account.

Finish-Production-Order-GL-Entries-Dynamics-NAV

As you can see the inventory previously posted against the interim account is cleared and moved to the inventory account, the WIP account is at this stage also cleared, and any variances are posted against the variance accounts in the P&L.

Both the inventory account and the different variant accounts (there are five of them) comes from the combination of the inventory posting group defined on the item being produced and the location where the output is posted against.

The total net change in the general ledger for the production order is at this stage the following.

Total-Step-4-GL-Entries-Dynamics-NAV

5. Invoicing Subcontracting Purchase Order

The last step is to invoice the subcontracting purchase order. This is quite often a period of time after the production order has been finished. Invoicing the purchase order is done by entering the vendors invoice number and the amount invoiced (which can be different than the initial cost defined on the routing). The following value entries are created against the production order when the subcontracting purchase order is invoiced.

Subcontracting-Value-Entries-Dynamics-NAV

Note the document no., which is the posted purchase invoice and not the production order. This could be a ‘trap’ if you are trying to navigate using the production order number and expecting to see all transactions.

Navigate on the value entry, show the g/l entries, send them to Excel and do a pivot table and you see the net change by g/l account.

Subcontracting-GL-Entries-Dynamics-NAV

This transaction debited the WIP account and credited the cost of capacities account. The same was as a regular operation is posted (as described earlier). It also debited the purchase account and debited the accounts payable for the vendors. The cost of capacity account is according to the direct cost applied account in the general posting setup for the general product posting group defined on the work center and the general business posting group defined on the vendor. The WIP account is according to the inventory posting group and a blank location code. The purchase account is according to the general posting setup and the accounts receivables is according to the vendor posting group (just like a regular purchase transaction, nothing strange here).

Since the production order is already finished, when we run the cost adjustment batch job the next time (which should always be at least daily), Dynamics NAV will create two additional value entries according to below.

Variance-After-Subcontracting-Value-Entries-Dynamics-NAV

Navigate on the value entry, show the g/l entries, send them to Excel and do a pivot table and you see the net change by g/l account.

Variance-After-Subcontracting-GL-Entries-Dynamics-NAV

This cleared the WIP account again and posted it towards a variance account in the P&L. The variance account is in this case the account defined as the subcontracting variance account in the inventory posting setup (I prefer to have this separated on an account called subcontracting variance, it becomes clearer this way).

The final net change in the general ledger for the production order is as below.

Completed-Production-Order-GL-Entries-Dynamics-NAV

As you might notice above, the total inventory value in the balance sheet actually decreases. The explanation for this is that an additional component was used and the cost of that component was more than the capacity costs that was applied.

Conclusion

To use navigate, export to excel, and pivot to review transactions I think is a good way to review the impact in the general ledger for the different activities. I typically do this together with the customer for each implementation I do as part of the test phase (to confirm that it behaves as expected).

Below is a summary of the postings for the above activities, as mentioned it will look a bit differently if not on standard cost.

Production-Order-Postings-Overview-Dynamics-NAV

The costing is per production order line, if you have multiple production order lines then those are treated separate from a costing perspective

Some of the activities above can be automated in Dynamics NAV through the flushing methods, for details about this have a look at my previous post; Flushing Methods.

If you want to get into more details about inventory costing in Microsoft Dynamics NAV, then there is an excellent inventory costing white paper that can be downloaded here: White Papers.

Enjoy! :-)

Olof Simren - Freelance Microsoft Dynamics NAV Expert

Production Lead Time using Routings

$
0
0

The production lead time if you are using routings in Microsoft Dynamics NAV is the sum of the lead times for the operations that each can have 5 different time components; queue time, setup time, run time, wait time and move time.

In addition to the production lead time is the safety lead time defined on the item or stockkeeping unit card of the product being produced; this adds a slack time between the scheduled ending time for the last operation and the due date of the production order.

The below illustrates the different times and how they together makes up the total lead time on a production order in Dynamics NAV.

Production-Order-Lead-Time-Illustration-Dynamics-NAV

The setup time and run time makes up the execution time of a production order and is the time that could affect the cost of the production. The queue time, wait time and move time is sometimes referred to as the interoperation time of an operation and those do not add any costs to the production, they are purely for scheduling purpose.

Below is a description of each of the times and some notes worth knowing. I am using a production order routing for 10 units and changing the different times to see the effect on the operations (I think this is the best way to simulate how the different times affects the routing). The same fields are obviously on the routing attached to the item as well and this is typically where you set things up (instead of modifying times on individual production orders).

Queue Time

The queue time is defined on the work center card in Dynamics NAV and is entered in the unit of measure you specify in the queue time unit of measure code. It represents an expected time that the product wait at a work center before the setup of the operation can start. A queue in a work center is typically used to neutralizing delays in previous operations.

Queue-Time-Work-Center-Dynamics-NAV

The queue time has no impact on the load of a work center but moves the starting time of the operation forward and therefor creates a gap between the end time and start time of two operations. In our example we have a queue time of 120 minutes on work center 200 which has the effect of moving the starting time to be 120 minutes after the ending time of the previous operation. Having a queue time on the work center for the first operation does not really affect anything since the start time of the first operation is when you start the production order.

Queue-Time-Routing-Dynamics-NAV

Note that the queue time is inside the calendar of the work center.

Setup Time

The setup time for the operation should reflect the time it takes to prepare and setup a job (prior to the process or machine is running). The setup time is per production order and concurrent capacity. Example; if the work center represent employees assembling items and you want two employees to assemble items, then you will have the concurrent capacity set to 2 and the allocated time (expected capacity need) will be twice the setup time since two employees needs to be setup, but it is independent of the lot size (e.g. the quantity on a production order does not affect the setup time needed).

Setup-Time-Routing-Dynamics-NAV

The setup time is defined in the unit of measure entered in the setup time unit of measure field in the routing.

The setup time could be included in the cost calculation if the cost incl. setup is activated in the manufacturing setup table. It is most common to have the setup time included in the cost; at least that is my experience.

Run Time

The run time should reflect the time it takes to produce a certain quantity specified in the lot size field (also see previous post Production Lot Sizes), it is entered in the unit of measure specified in the routing. The run time is multiplied with the quantity of the production order, if for example the production orders is for 10 units and the run time is 10 minutes per 2 units then the allocated time (expected capacity need) on the work center is 50 minutes (10 / 2 * 10).

Run-Time-Routing-Dynamics-NAV

If the concurrent capacity is set to something else than 1 (representing multiple machines or employees doing the same work concurrently as described earlier), then the start and end time is adjusted accordingly. Concurrently capacity of 2 will finish the operation in half the time, but with the same amount of allocated time.

Run-Time-Routing-Concurrent-Capacity-Dynamics-NAV

If an operation starts before the previous operation has ended then the send-ahead quantity can be used to define that. For example; a send-ahead quantity of 5 means that the next operation will start when 5 units are completed. In the below example 5 units are completed after half the operation (and plus the 120 min queue time on work center 200).

Run-Time-Routing-Send-Ahead-Quantity-Dynamics-NAV

The run time typically affects the costs of the product, which is achieved by specifying costs on the work center card (or alternative on the routing if different cost depending on the routing should be applied).

Wait Time

The wait time is used to specify if the parts needs to wait before continuing to the next operation, something like paint that needs to dry could be a candidate for defining as a wait time. Another use of the wait time is for specifying the lead time for a subcontracting operation (I will probably do a future post about subcontracting operations). The wait time is specified in the wait time unit of measure on the routing.

The wait time does not allocate any time on the work center (it does not affect the expected capacity nor the cost of production). It is also outside the calendar of the work center, even if the work center calendar is setup to work 7 am to 4 pm, an operation with a wait time can finish 8 pm. This is the main difference between the wait time and move time.

Wait-Time-Routing-Dynamics-NAV

Move Time

The move time is the time it takes to move the material to the next operation; it is specified in the move time unit of measure on the routing. The move time sits between the two operations and is assigned to the preceding operation.

Like the wait time, the move time does not allocate any time on the work center. But it is inside the calendar of a work center (the product will not move itself during the night :-) ).

Move-Time-Routing-Dynamics-NAV

Safety Lead Time

The safety lead time can be defined on the item card or stockkeeping unit card of the product being produced. It moves the production order ending date to an earlier date and is used to create some slack time between the orders (sometimes also referred to as float). If an item or a stockkeeping unit does not have a safety leady time, then Dynamics NAV uses the default safety lead time specified in the manufacturing setup table.

Safety-Lead-Time-Production-Order-Dynamics-NAV

Summary

Below is a summary of what functionality in the routing that corresponds to the different times in Dynamics NAV.

Lead-Time-Components-In-Routing-Dynamics-NAV

Most of the times it is quite straight forward to define the times on the routings when implementing Dynamics NAV, but from time to time it can be tricky to get the system to behave as required. I always simulate the times together with the customers with a sample set of items before applying a setup on a larger set of items (or start migrating routings from an old system).

It’s recommended to choose between hours, minutes and days and keep it consistent. Dynamics NAV allows you to mix the way you want, but there is a risk of making things more confusing/complicated than needed when mixing the capacity unit of measures for different times/routings.

If you select to use days as a unit of measure, then remember that 1 day = 24 hours, and not 8 (working hours).

The above describe a serial operatons where the product travels the same path throughout the routing, Dynamics NAV also supports parallel operations which in my mind is not very common. My plan is to do a future post about parallel operations.

Only setup and run times are reported back to Dynamics NAV when posting the production. My experience is that most companies estimates their times and then uses the estimated times for posting the production (instead of asking their employees/operators to keep track of the time spent). The exception to this is when an add-on for registering starts and stops is used, then you obviously want to capture actual times.

Olof Simren - Freelance Microsoft Dynamics NAV Expert

Shop Floor Terminal Role Center

$
0
0

For those of you that are reading my blog posts you probably know that I have been working on a Shop Floor Terminal role center for Microsoft Dynamics NAV (mostly for my own training, kind of how I learn). I have finally got some time to finish it (was stuck at Tampa airport for 3 hours before a 3 hour flight, more or less an entire work day in transit), so here it is!

The concept with the Shop Floor Terminal role center is to provide an interface for a terminal in the production where the operator can see upcoming tasks and all the related information such as comments, liked documents, components to be used, etc… It can be used in environments where production orders are routed through work centers (it does not support machine centers at the moment) and where paperwork is not wanted.

It uses custom progress bars to display the progress of each production order (the custom progress bars are described in a previous post called Custom Progress Bar in Dynamics NAV 2013 R2). It also relies on interactions between the role center parts which are also described in an earlier post, called Interaction between Role Center Parts in Dynamics NAV 2013 R2 and it has a custom chart which I described in the Custom Business Chart Add-In Example post. In addition to this it has an information part that displays a running clock and custom messages to the operator.

The objects can be downloaded from the downloads page (installation instructions are in the end of this post), and the purpose is kind of twofold; provide a useful role center for a terminal and also to show how things can be achieved with some C/AL code and .NET components.

The components in the Shop Floor Terminal role center are;

1. Work Center Task List

2. Comments

3. My Notifications

4. Shop Floor Terminal Information

5. Components

6. Links

7. Work Center Load Chart

Shop-Floor-Terminal-Role-Center-Dynamics-NAV

1. Work Center Task List

The work center task list is the main part where the operator can see the tasks that are supposed to be run on the work center(s). This list also has some interactions build in; depending on what task that is selected the Comments, Components and Links are displayed related the to the operation. This way you can be completely paperless and the operator can see the information needed just by selecting the task in the task list.

The routing status can be updated by simply clicking (AssistEdit) on it and selecting the new routing status.

Shop-Floor-Terminal-Update-Routing-Status-Dynamics-NAV

In addition, clicking the production order no. will open the production order and clicking the operation description will open the production journal for the production order where the output and consumptions can be posted from.

Note; getting Dynamics NAV to open the output journal populated with the one operation instead of the production journal would not be a big thing to change if required.

The routing progress bar is to be used to determine what production orders that are in progress and are expected to be received. Each progress bar has different sections that represent each operation, the length of the sections indicates the expected capacity need of the operation, the color of the part indicates the status and the section with the red edges represent operations on the current work center. By looking at the progress bar an operator can see the status of the previous operations cross all production order that are scheduled through his/her work center.

Shop-Floor-Terminal-Routing-Progress-Bar-Dynamics-NAV

2. Comments

The comments part displays the comments associated with the production order. The comments displayed are the comments on the production order routing line highlighted in the work center task list and the comments on the header of the production order.

Shop-Floor-Terminal-Comments-Dynamics-NAV

Note; it would be quite easy to extend this to display comments from the item itself, or from a sales order if the production order is created from a sales order. The comments part is based on a temporary table.

3. My Notifications

The standard Dynamics NAV notifications; nothing unusual here.

4. Shop Floor Terminal Information

This shows the current date and time (yes it updates itself each second :-) ), as well as the work centers that are part of the terminal (in case there are multiple different work centers defined to be displayed at the same terminal).

The lower part can contain a message to be displayed to the operator (the message is defined against the user id in the shop floor terminal setup table).

Shop-Floor-Terminal-Information-Dynamics-NAV

5. Components

Shows the components related to the operation selected in the task list (using the routing link code as a filter). Nothing strange.

Shop-Floor-Terminal-Components-Dynamics-NAV

6. Links

The links displayed are the links related to the item being produced. This is typically where you link to drawings and work instructions. Displaying the links like this give the operator an easy access to those documents.

Shop-Floor-Terminal-Links-Dynamics-NAV

7. Work Center Load Chart

The work center load chart is displaying available vs. allocated capacity. It is intended to provide the operator an overview of how much work there is planned. Green shows available capacity, blue shows allocated time and red shows what have been over scheduled.

Shop-Floor-Terminal-Load-Chart-Dynamics-NAV

The period length can be changed between day, week and month and the period displayed can be moved using the previous and next period buttons.

Installation Instructions

Import the objects that you can download on the downloads page (they are all stand alone objects in the 50080 range). Then run the setup page and link the logins to the work centers.

Note that you can have multiple work centers linked to a logon, you do this with a pipe (|) between each work center code or by specifying a range of work centers with two dots (..) (just a regular Dynamics NAV filter).

Shop-Floor-Terminal-Setup-Dynamics-NAV

Next you create a role center for the shop floor terminal users. In the below screen shot I called it ‘SHOP FLOOR TERMINAL’. The role center is setup to use page 50081 (as downloaded).

Shop-Floor-Terminal-Profile-Dynamics-NAV

The last step is then to associate the users with the role center through the user personalization.

Shop-Floor-Terminal-User-Personalization-Dynamics-NAV

This should be it.

If you made it this far you might think; why on earth will someone develop all this and put it for download on a blog? Well, good question. :-) For me it is kind of how I learn, I learn by doing and by trying to do things that are slightly ‘outside the box’. You can go to Microsoft and get awesome training in how to develop in Dynamics NAV, but if you want to do something like a custom progress bar by using a .NET component to draw a bitmap and stream it back into a blob field for displaying it in the client you have to use you creativity and find a way to do it yourself.

I hope at least this can provide some inspirations. :-)

Olof Simren - Freelance Microsoft Dynamics NAV Expert

Scrap in Production

$
0
0

Microsoft Dynamics NAV has multiple ways in which you can handle scrap in the production. There are scrap related to an operation in the routing, there are scrap related to individual components and there are scrap related to the product being produced. Just like any other functionality, it is important to know all the options when configuring and implementing Dynamics NAV.

The scrap related setup has an impact on both the material and capacity planning. If you are using the standard costing method to value your inventory then the scrap related setup also has an impact on the cost roll-up. Scrap is quite common in a manufacturing environment and many companies could benefit from utilizing the functionality.

It is important to know that scrap in Dynamics NAV is truly scrap (waste), if it is something that you want to keep track of in the system as inventory and reuse somehow then it should be handled as additional output instead (e.g. by-products, reclaimed material, etc.). See my other blog post about Additional Outputs on Production Orders.

Below are the different options described with some examples where item A is produced by machining component B and then assembling it with component C. The routing with the two operations is setup like below.

Routing-Dynamics-NAV

The two components are in the production BOM like below. Note the routing link codes that link component B to operation 10 and component C to operations 20.

Production-BOM-Dynamics-NAV

Now let’s look at the different scrap related options one at a time using the above routing and production BOM.

Scrap % on the Item Card

The finished item can have a scrap percentage defined on the item card. This scrap percentage refers to the finished product and is used by NAV to both increases the required components and capacity need. If you are producing a 100 units and you define a 10% scrap on the item card you will get the demand for a 110 units of the components and the capacity need will also be according to producing 110 units.

In Dynamics NAV you find the Scrap % field on the Replenishment tab of the item card.

Scrap-Percent-on-Item-Card-Dynamics-NAV

When the production order is created the value of the Scrap % field from the item is transferred to the Scrap % field on the production order line.

Scrap-Percent-on-Production-Order-Line-Dynamics-NAV

The run time part of the capacity need on each of the operations is increased by 10 % (just like if we were making 110 units instead of 100).

Scrap-Percent-on-Production-Order-Line-Routing-Dynamics-NAV

The components required are also increased with 10%.

Scrap-Percent-on-Production-Order-Line-Components-Dynamics-NAV

This could for example be used if you after completed production have an inspection of the units (part of the routing) and you expect a certain failure rate.

Scrap % in Production BOM

You can also have a scrap % defined on the production BOM lines. This will increase the required quantity for that component but will not affect any of the other components or the capacity needs for the operations.

You set this up in the scrap % field on the production BOM line.

Scrap-Percent-on-Production-BOM-Dynamics-NAV

When the production order is created the value of the Scrap % field from the production BOM line is transferred to the Scrap % field of the production order component and the expected quantity for the component is increased accordingly.

Scrap-Percent-on-Production-Component-Components-Dynamics-NAV

This has no effect on the production order routing.

Scrap-Percent-on-Production-Component-Routing-Dynamics-NAV

The use of this could be if you have certain components that you consume where not all are going to be accepted for any reason, or if you only use a part of a component (like 9 inch of a 10 inch bar) and scrap the rest.

Scrap Factor % in the Routing

You can define scrap in relation to an operation as well. Dynamics NAV has a scrap factor % field in the routing that can be used to define if an operation generates scrap. This will increase the required quantities for all the components that are used in the operation and all previous operations. It will also increase the capacity need for the operation and all previous operations. If you use this then linking the components to the operations using the routing link codes are important (otherwise all your components will have increased quantities).

The scrap factor % is setup in the routing line.

Scrap-Factor-Percent-on-Routing-Dynamics-NAV

When the production order is created the value of the Scrap Factor % field from the routing line is transferred to the Scrap Factor % field of the production order routing and the capacity need for the operation is increased accordingly.

Scrap-Factor-Percent-on-Routing-Routing-Dynamics-NAV

The related components quantities are also increased accordingly.

Scrap-Factor-Percent-on-Routing-Components-Dynamics-NAV

This could for example be used for operations that have a certain expected failure rate.

Fixed Scrap Quantity in the Routing

Scrap related to an operation can also be defined as a fixed quantity. Dynamics NAV has a fixed scrap quantity field in the routing; it has the same effect as the scrap factor % but with the difference that it is specified in an absolute quantity instead of a percentage.

You set this up in the Fixed Scrap Quantity field on the routing.

Fixed-Scrap-Qty-on-Routing-Dynamics-NAV

When the production order is created the value of the Fixed Scrap Quantity field from the routing line is transferred to the Fixed Scrap Quantity field of the production order routing and the capacity need for the operation is increased accordingly.

Fixed-Scrap-Qty-on-Routing-Routing-Dynamics-NAV

The related components quantities are also increased accordingly.

Fixed-Scrap-Qty-on-Routing-Components-Dynamics-NAV

This could for example be used for operations on a machine that needs to be setup and tested on a few units before starting the run. Another common example is if you are doing some destructive testing on a certain quantity as part of the operation.

Posting of Consumption with Scrap

Consumption should always be posted according to how many units you have consumed (both good and bad units). This way you get an accurate inventory balance and correct cost posted against the production order. Dynamics NAV does not differentiate between consumption of components that was scraped and components that was used in good parts, there is only one consumption quantity field and this is where the total consumed quantity should go.

If you want to record why you consumed more than expected then there is a reason code field that could be used. The reason code field is a field that is not in the journal by default so if you want to use this field you need to add it (in standard Dynamics NAV the reason code is setup against a journal batch instead of for each line, but just adding the field to the journal works good).

Production-Journal-Consumption-Reason-Code-Quantity-Dynamics-NAV

The Reason Code goes onto the value entries when the journal is posted and can be used to analyse reasons for scrap.

Value-Entries-With-Reason-Code-Dynamics-NAV

The downside of the reason codes are that they are not mandatory for scrap, and they are hard to make mandatory since there is only one field to enter the consumed quantity (you don’t want to have it mandatory all the time since it then adds an overhead when posting consumption). Because of this, I think a better way to record reasons for scrap is to use scrap codes for the outputs (described below).

Posting of Output with Scrap

For posting of the operation outputs Dynamics NAV has two fields, output quantity and scrap quantity. It is important the quantity of the good parts and the scrap parts are separated when posting the output. The output quantity is obviously the quantity that goes into stock (if it is the last operation) and carries all the production costs, while the scrap quantities are only recorded against the operation on the capacity ledger entries.

For output you also have a Scrap Code field where you can select a code to record the reason for the scrap.

Production-Journal-Output-Scrap-Code-Quantity-Dynamics-NAV

The Scrap Quantity and Scrap Codes goes onto the capacity ledger entries when the journal is posted and can also be used to analyse reasons for scrap.

Capacity-Ledger-Entries-Scrap-Code-Dynamics-NAV

If you are back flushing your components (see previous post related to Flushing Methods) then the quantity of those are based on the output quantity plus the scrap quantity, so it is important to enter the scrap quantities in this case.

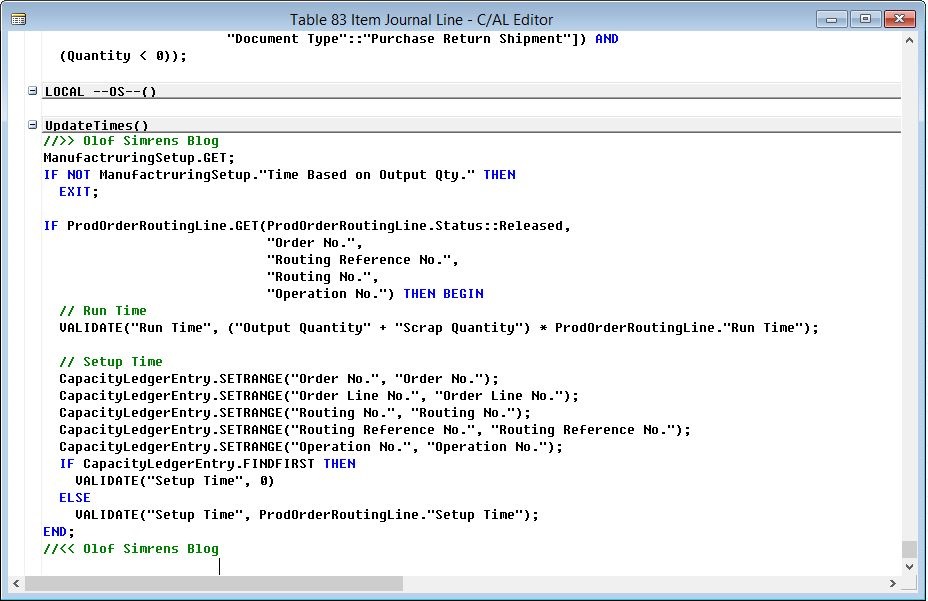
The scarp codes are in standard Dynamics NAV only for machine centers (for some unknown reason), to enable it for work centers as well you could change the code as below (to make it available for all types of outputs).

Scrap-Code-for-Output-Dynamics-NAV

To make the scrap code mandatory if there is a scrap quantity, just alter the code as below. Making scrap codes mandatory when posting scrap makes the data more reliable, otherwise you sooner or later end up with scrap quantities without scrap codes.

Scrap-Code-Mandatory-Dynamics-NAV

As with anything else; setup some sample items and model how things behave before applying/changing the setup for a larger sets of items.

Olof Simren - Freelance Microsoft Dynamics NAV Expert

Total Cost Allocation for Multiple Outputs

$
0
0

To allocate the total costs posted against a production order towards multiple outputs is a bit tricky in standard Microsoft Dynamics NAV, you more or less have to manually separate the different costs and post them against each of the production order lines (this since the cost calculations in Dynamics NAV is per production order line).

For material and capacity costs this involves dividing the quantities consumed and times spent between the production order lines and then post them individually against each of the lines. And for subcontracting costs it is more or less impossible (although nothing is impossible in Dynamics NAV, but this is close :-) ).

If you are in the business of taking things apart or you have processes that creates by-products, co-products or reclaimed material then you could consider modifying Dynamics NAV to do the allocation of the costs based on factors defined through a setup. This would eliminate the need for manually allocating the costs on each production order and increase the accuracy and consistency of the inventory costs. I believe you have this feature in both Dynamics AX and SAP, so why not in Dynamics NAV?

Here is a conceptual design describing how this can be accomplished in Dynamics NAV (which also would work well with functionality like the additional output functionality I have described in a previous blog post) and some scenarios that describes how it will work with different costing methods.

Conceptual Design of Cost Allocation for Multiple Outputs

The code in Dynamics NAV that summarizes the costs for a production order line and forwards it to the output is found in the cost adjustment functionality where it is done in two steps;

1. The different costs related to each production order line are calculated and inserted into the Inventory Adjmt. Entry (Order) table.

2. The costs in the Inventory Adjmt. Entry (Order) table are compared with the costs of the output item ledger entry(s). If a difference exists the output related item ledger entry(s) will be adjusted by creating value entries (the same was as any other cost for an item ledger entry is adjusted).

Knowing the above standard functionality, we can simply modify the code in the functionality for step 1 to consider all the costs posted against a production order and allocate it towards the different production order lines using defined allocation percentages.

Once step 1 above has been modified to allocate the costs, then step 2 will take care of adjusting the cost of the item ledger entry(s) without having to be modified.

An example of how it can be done; The production order line is extended with a Cost Allocation % field that will control how the cost is going to be allocated (most likely defaulted from the item card or from a setup table of some kind, there are as many variations of this as there are manufacturing companies). The total of the Cost Allocation % on a production order should always be 100 %.

Production-Order-with-Cost-Allocation-Dynamics-NAV

Next you add the same Cost Allocation % field to the Adjmt. Entry (Order) table and write code to transfer the field from the production order line to the Adjmt. Entry (Order) table at the time the production order is change to finished.

Transfer-Cost-Allocation-From-Production-Order-Dynamics-NAV

Once the fields are in the database we can go and alter the cost adjustment function to allocate accordingly. This we do in the Calc. Inventory Adjmt. – Order codeunit (5896), where there is a function that handles the material costs (called CalcActualMaterialCosts) and another function that handles the capacity costs including subcontracting (called CalcActualCapacityCosts).

The code can for example be modified according to below. Where #1 eliminates the filter on the production order line (to get the total costs for the entire production order) and #2 adjusts the total costs according to the Cost Allocation % and the totals.

Cost-Allocation-for-Material-Costs-Dynamics-NAV

The same change is done for the capacity costs and the subcontracting costs (assuming we also want to include those costs in the allocation).

Cost-Allocation-for-Capacity-Costs-Dynamics-NAV

That should be it, short and sweet! :-)

Example of Cost Allocation for FIFO Cost Item

Let’s test it; we create a production order with multiple outputs, in this case four outputs using FIFO costing method (the same example is also applicable to average cost items). The production order in this case simulates a plastic injection molding process where a plastic fork, spoon and knife are produced at the same time. The process also creates some plastic that goes back into inventory to be re-grinded (e.g. the spure, gate and runner, if you are into plastic injection molding). The allocation of the costs is setup to be 30 % towards the forks, 29 % towards the spoons, 31 % towards the knifes and 10 % towards the regrind plastic.

Production-Order-with-Cost-Allocation-Dynamics-NAV

Then we post the output for the different products. In this case we use the output journal where we enter the output quantities, scrap quantities and the times. Note that we now can enter the total time against one of the production order lines and Dynamics NAV will later allocate the costs according to the percentages.

Output-Journal-Multiple-Outputs-with-Cost-Allocation-Dynamics-NAV

Next we post the consumption. Same here; we can enter the total quantity consumed against the first line and Dynamics NAV will later allocate the costs according to the percentages.

Consumption-Journal-Multiple-Outputs-with-Cost-Allocation-Dynamics-NAV

The above creates the following item ledger entries with expected costs for the outputs and actual costs for the consumption (this is all standard Dynamics NAV functionality).

Item-Ledger-Entries-Before-Cost-Adjustment-with-Cost-Allocation-Dynamics-NAV

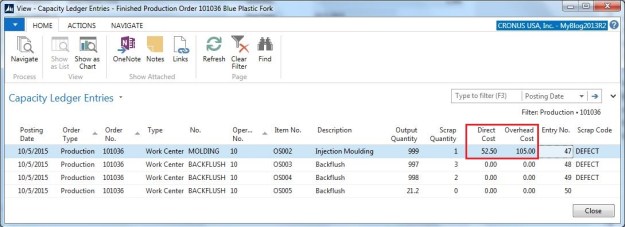
And the following capacity ledger entries with the capacity costs (also standard Dynamics NAV).

Capacity-Ledger-Entries-with-Cost-Allocation-Dynamics-NAV

The total cost of production is then 189 (26.5 + 5 for consumed inventory and 105 + 52.5 for the capacity).

We finish the production order and run the costs adjustment batch job. After doing this we can review the costs of the outputs which now are as below. The total cost of 189 has been allocated by the cost adjustment batch job according to the percentages (30 %, 29 %, 31 % and 10 % of the total 189).

Item-Ledger-Entries-After-Cost-Adjustment-with-Cost-Allocation-Dynamics-NAV

It works! :-)

Now, let’s simulate that the costs of one of the consumed components changes and see what happens (better test this, just to be sure). We do this by revaluating the inbound transaction related to one of the consumed items. We use the revaluation journal and revalue the raw material from 0.5 to 0.6 per LBS.

Revaluation-of-Raw-Material-Dynamics-NAV

Then we run the cost adjustment batch job again and the cost of the consumed raw materials has now changed which also revalued the outputs accordingly. Nice!

Item-Ledger-Entries-After-Cost-Adjustment-and-Revaluation-with-Cost-Allocation-Dynamics-NAV-2

Now we can control the total cost allocation on production orders, and the values are also posted into the general ledger the same way (as in standard Dynamics NAV which integrates the value entries with the general ledger).

Cool! :-)

Example of Cost Allocation for Standard Item

Let’s also test the same example but with standard cost items and see what happens (since standard cost for produced items are common, especially in the US).

We use a new set of items that has been setup with the costing method as standard and rolled-up with a production BOM and routing. The costs fields for the fork has been roll-up according to below.

Standard-Cost-Roll-Up-Dynamics-NAV

Note that the cost allocation is only for the actual production costs posted against a production order, to do a cost roll-up for a standard cost item you also need to have a production BOM and routing for each of the items to have a correct standard cost rolled up.

We then create a new production order with the standard cost items and the same cost allocation percentages as before.

Production-Order-Standard-Cost-with-Cost-Allocation-Dynamics-NAV

We post the consumption and output the same way as we posted them in the FIFO example, then we look at the item ledger entries. They obviously have the expected costs according to the standard costs.

Item-Ledger-Entries-Standard-Cost-Before-Cost-Adjustment-with-Cost-Allocation-Dynamics-NAV

We finish the production order and run the costs adjustment batch job. Now the expected costs has moved to the actual costs which are still the same as the standard costs.

Item-Ledger-Entries-After-Cost-Adjustment-Standard-Cost-with-Cost-Allocation-Dynamics-NAV

But when making a drill-down into the value entries we can see that the variances has been adjusted according to the cost allocation percentages and the total actual cost. The material variance is 5.35 ((0.006 * 999) – (37.80 * 30 %)), the capacity variance is 15119.10 ((15.15 * 999) – (42.5 * 30 %)) and the capacity overhead variance is 30238.20 ((30.30 * 999) – (105 * 30 %)). This is the variances that will be posted into the P&L.

Value-Entries-After-Cost-Adjustment-Standard-Cost-with-Cost-Allocation-Dynamics-NAV

So, it also works as expected for standard cost items. Nice! :-)

Defaulting Cost Allocation Percentages

If using that above approach then there are many ways of which the Cost Allocation % field on the production order lines can be defaulted. It can be according to the weight of the products (if they are all made from the same raw material for example), based on market material prices (if you are separating different metals for example), based on sales prices, etc… So, how to develop that part of the setup will be from case to case depending on the business requirements.

Other things to consider is if the allocation should only be for material and not for capacity or subcontracting costs (or the opposite). In some cases it might even make sense to have multiple cost allocation fields on the production order line to define a percentage per cost type (e.g. one for material costs, one for capacity costs, one for subcontracting costs, etc.). In other cases the costs of only some of the operations should be allocated against certain outputs (if for example a co-product gets created at the initial operation while other co-products are created at later operations), in those cases it might be slightly more complex to define, but the concept still applies.

A modification like this is something you need to be 100 % sure that it is working as expected and that all scenarios are covered. Modifying the cost adjustment routine and create something that is not working perfectly is the last thing you want to do.

Also note that if you use any kind of item tracking (lot or serial numbers) then you will not get the full trace-ability if you consume the complete quantity against only one of the production order lines. This since the trace-ability in Dynamics NAV is by production order line.

Olof Simren - Freelance Microsoft Dynamics NAV Expert

Subcontracting Part 1: The Basics

$
0
0

This is the first part of a series of blog posts about the subcontracting functionality in Microsoft Dynamics NAV. It describes how to setup and use the basic functionality, which is something that is very common to use for manufacturers (3 out of 4 places I go to uses some kind of subcontractors to perform operations that they can’t or don’t want to do in-house).

Future posts on the subject subcontracting will describe things like how to ship the products to the subcontractor in a proper way, how shipping charges can be applied, how to receive subcontracted parts using warehouse receipts, how the process can be enhanced with some simple tweaks and some other good stuff. As always, my posts are based on long time real life experience and I try to include as many useful tips that I can (at least people I talk to find them useful :-) ).

The basic subcontracting functionality to me includes four things:

1. Setting up a work center that is linked to a vendor and acts as a subcontractor.

2. Setting up a routing with an operation that uses the subcontracting work center.

3. Using the subcontracting worksheet to create purchase orders.

4. Receiving and invoicing the purchase orders.

The above is the basic you need to master to get started, they are described one by one below.

Subcontracting Work Center

To do subcontracting in Dynamics NAV you need a work center that is linked to a vendor through the Subcontractor No. field. I always recommend to setup such a work center with the same code as the vendor number if possible (I also typically recommend to have a prefix on all number series so that all vendors starts with ‘V-‘ for example), this way it becomes very clear that the work center is a subcontractor.

Subcontracting-Work-Center-General-Setup-Dynamics-NAV

You have the option to use a generic work center for a group of subcontractors (something like a work center called SUBCONTRACT), but then you need to change the vendor for each purchase order that is created through the subcontracting worksheet (described later). So this way is really only useful if you have lots of subcontractors that you rarely use and you don’t want to setup too many work centers.

Typically a subcontractor gets paid based on the number of units that are processed (instead of the time that they spend). To setup this you set the Unit Cost Calculation field to Units instead of Time which is the default one. You typically also pay a different price based on what items that are processed, so instead of specifying the cost on the work center card you want to define it on the individual routings, this is done by checking the Specific Unit Cost field on the work center and then enter the costs on the routing line.

You normally also want to setup a separate posting group to control where in the P&L the subcontracting costs gets posted (see previous post related to production posting into the general ledger). An alternative or compliment would also be to define some specific dimensions for the subcontracting work centers (see previous post related to dimensions on production orders).

Subcontracting-Work-Center-Posting-Setup-Dynamics-NAV

You also need a calendar on the work center even though no real scheduling of it will take place (we leave that to the vendor, all we want is to put in the total lead time in the routing).

The Shop Calendar Code has less importance (but is mandatory); I will use the Cronus ‘One shift Monday-Friday’ calendar for this example, it will at least give me a starting time and ending time that is within normal working hours. A valid option is to setup a special subcontracting calendar code that has a 24 h per day 7 days a week calendar, I have seen that lots of time and it will also work well. The downside of this is that you then might get funny looking start and ending times in the middle of night (although most companies are happy if the days are correct and does not worry that much about the time during the day that Dynamics NAV indicates).

You see further down in this post that we will use the wait time to define the lead time of the subcontractor, and by using the wait time Dynamics NAV does not look at the calendar at all (see my previous post about production order lead times).

Subcontracting-Work-Center-Scheduling-Setup-Dynamics-NAV

Note; remember to also go and calculate the calendar.

This should be it for the work center.

Routing with Subcontracting

Now when we have our subcontracting work center define we can go and create the routings for the products that will use the subcontractor for part of the process. In this example I will use the Cronus bicycle that will be sent out to a subcontractor to get a special FIFA 2014 paint job on the frame. For this I have created a new item number (1000-FIFA2014) that has a production BOM that contains the Cronus bicycle (1000). The routing for the bicycle with the special paint is then created with an operation on the work center that was created previously (V-00001).

For the subcontracting operation we specify a Unit Cost Per equal to 95, which means that we expect to pay the subcontractor $95 per bicycle that they paint. We set the Wait Time to 14 Days meaning that we expect the bicycle to be painted and received back in 14 days (e.g. the lead time for the subcontractor).

Subcontracting-Routing-Dynamics-NAV

When receiving a subcontracting purchase order (described later) Dynamics NAV finishes the related operation on the production order, this means that if the subcontracting operation is the last operation on the production order we will get the product into inventory (which in some cases are great). But if this is not wanted then we can add an additional operation after the subcontracting operation to the routing. This will give us some more flexibility when it comes to controlling scrap and the quantities that goes into inventory, and it also simplifies if you are using any kind of item tracking (lot and/or serial numbers) on the finished product. An operation like this can be either with or without any costs or times.

Both methods will work, my experience is that most companies benefits from having an operation after the subcontracting operation in the routing. But the method of choice should be from case to case.

In this example we add a quality inspection operation of 30 minutes after the subcontracting operation.

Subcontracting-Inspection-Routing-Dynamics-NAV

We also add a simple comment to the operation (to see this feature as well).

Subcontracting-Routing-Comment-Dynamics-NAV

We then do a cost roll up on the FIFA 2014 painted bicycle (which is set to standard costing method) and we see the subcontracting cost in the Single-Level Subcontrd. Cost field in the item table (also described here).

Subcontracting-Cost-Roll-Up-Dynamics-NAV

Now the setup is done and we can start testing the functionality.

Creating a Subcontracting Purchase Order

Subcontracting purchase orders are created using the subcontracting worksheet based on released production orders (yes they need to be released, firm planned will not work, sometimes a bit unfortunately but possible to live with). So, we start with creating a released production order for 10 PCS of our FIFA 2014 painted bicycles. We can on the production order review the routing to make sure the starting dates make sense.

We enter a due date on 9/10/2015, this calculates backwards and ends up with a starting date for the subcontracting operation on 8/26/2015 (which is the 14 days lead time for the subcontractor and the 1 day default safety lead time that is defined in the manufacturing setup). This is as expected.

Subcontracting-Production-Order-Routing-Dynamics-NAV

Note that the wait time can be updated on individual production orders if required (maybe larger orders takes more time for example).

Next step is now to create the purchase order for the subcontracting operation. We do this in the subcontracting worksheet using the function called calculate subcontracts. The calculate subcontracts function will insert a record for each released production order that has a subcontracting operation that is missing a related purchase order.

Subcontracting-Worksheet-Dynamics-NAV

This is where you can change the vendor no. if you want to purchase the service from another vendor (if you for example using a generic work center for a group of subcontractors). When you are happy with the suggestion you press carry out action message to create the purchase order.

The purchase order that is created is a bit special compared to a regular purchase order. It has some references on the line to the operation in the production order routing (through the fields production order no., production order line no., operation no., and work center no.). The purchase order line has the item number of the item being produced on the line and an amount according to the cost defined in the routing (if not changed in the subcontracting worksheet).

Subcontracting-Purchase-Order-Dynamics-NAV

If you zoom on the line (about this page in the newer versions of Dynamics NAV) you notice that the field Qty. per Unit of Measure is 0, which makes all the base quantity fields also 0. This is how NAV excludes this line from availability calculations (e.g. MRP etc.) since it is not a real purchase order for inventory.

Subcontracting-Purchase-Order-Line-Zoom-Dynamics-NAV

As you noticed, the description of the purchase order line contains the description from the routing. What I typically do is to design the purchase order printout to include additional data from the production order (when linked to one); for example can the comments behind the operation and the production order number be included. Sometimes the components to be delivered to the vendor are also included so they know what to expect to be received. This is easy since we have a reference to the production order on the purchase order line. It could look something like below.

Subcontracting-Purchase-Order-Printout-Dynamics-NAV

That’s it for creating a subcontracting purchase order.

Receiving and Invoicing a Subcontracting Purchase Order

Now the vendor is done with painting the bicycles and we receive them back. In Dynamics NAV we then open the purchase order and post them as received the same way we do on regular purchase orders (assuming we are receiving on purchase orders). I will in a later post describe how we can receive using warehouse receipts, which will require a small tweak to the code.

We enter the quantity to receive and press post and receive.

Receiving-Subcontracting-Purchase-Order-Dynamics-NAV

Posting the receipt of the subcontracting purchase order creates capacity ledger entries against the operation on the production order. If this was the last operation on the production order we would also get some output transactions of the finished product. In our case we still have the quality inspection operation left to complete before we get the product into inventory.

Subcontracting-Capacity-Ledger-Entry-Dynamics-NAV

Next we finish the rest of the production order by posting the consumption of the bicycles, the output of the outstanding operation and changing the status to finished on the production order. We now have 10 additional pieces of our FIFA 2014 Bicycle in stock that has been produced by a subcontractor using 10 pieces of the regular bicycles.

Subcontracting-Production-Order-Entries-Dynamics-NAV

We get the invoice from the subcontractor and post it as we do with regular invoices (e.g. enter the vendor invoice number, adjust the posting date and the amount to match the invoice received then post it as invoiced).

When looking at the statistics on the production order we can see that the subcontracting cost(s) are separated from the capacity and material costs on a production order. Note that I changed the amount slightly when I invoiced the purchase order (increased it from 950 to 990, forgot to make a screen shot of the invoice before I posted it :-) ).

Subcontracting-Production-Order-Statistics-Dynamics-NAV

This completes the basic subcontracting functionality. :-)

Next blog post will be about how to ship the components to the subcontractor, the idea is to use the same FIFA 2014 Bicycle and apply a proper procedure to ship the regular bicycles (including picking and whatever procedure you might have during shipments).

Olof Simren - Freelance Microsoft Dynamics NAV Expert

Subcontracting Part 2: Shipping Components to Subcontractors

$
0
0

This describes how to ship components to a subcontractor as part of a subcontracting process in Microsoft Dynamics NAV. It is a frequently asked question, so I thought it deserved its own blog post. As the title indicates, this is a second post in a series of posts related to subcontracting. It might make sense to read part 1 first since this kind of built on top of it (using the same items, etc.).

The key to shipping components to a subcontractor is to create a location that represent the vendor location and use transfer orders to ship the components. The production order components are then consumed from the subcontractor location when the finished part is received back.

There are two ways to setup Dynamics NAV to consume against a production order from a different location:

1. Setting the Components at Location on the Stockkeeping Unit Card.

2. Setting the Location Code on the Work Center and link the components with the operation using Routing Link Codes (only for NAV 2013 and forward).

Below is how option 1 can be done using the same FIFA 2014 Bicycle item as described in part 1. I picked option 1 because it also works in older versions of Dynamics NAV, but the concept will be the same if option 2 is used.

Create Subcontracting Location

We create a new location for the subcontractor. Preferably we use the same code as the work center and/or vendor. All we need is the address, no need to activate any of the warehouse functionality or to use bins (if not option 2 above is going to be used; then you need bins and you can probably get away with only one bin). The address is what is going to be on the packing slip printed based on the transfer shipment described later.

Subcontracting-Location-Entry-Dynamics-NAV

Don’t forget to also setup the inventory posting setup that controls the accounts for the inventory value in the balance sheet for the location. See Production Order Posting to General Ledger for how things integrate to the general ledger.

Components at Location on the Stockkeeping Unit

Next we define that when we produce our FIFA 2014 Bicycle on the BLUE location (which in this case is our main location where we have our inventory) we would like to consume the components from the subcontracting location. This is done using the Components at Location field on the stockkeeping unit card for the FIFA 2014 Bicycle at the BLUE location.

Components-at-Location-Stockkeeping-Unit-Dynamics-NAV

Create Subcontracting Production Order

Now when we create a production order for our FIFA 2014 Bicycle on the BLUE location the components gets the location that represents the subcontractor (V-00001). This means that we have a demand for the components at the vendor location and should replenish it using a transfer order (or it could also be to purchase the components from a vendor directly to the subcontracting location on a purchase order).

Subcontracting-Production-Order-Dynamics-NAV

Cool! :-)

Create the Transfer Order and Process the Shipment

To ship the bicycles that should be painted to our subcontractor we simply create a transfer order from the BLUE location to the V-00001 location. The vendor information will be inserted on the transfer-to tab from the setup on the location card.

Transfer-Order-to-Subcontractor-Dynamics-NAV

The items on the transfer order are then shipped like you ship any other types of orders from you main location. If you use directed put-away and picks you create a warehouse shipment and a warehouse pick, if you use inventory picks you create an inventory pick, if you don’t use any warehouse functionality at all you ship directly from the transfer order, etc..

The posted transfer shipment is then printed and becomes a packing slip to go with the products to the subcontractor. Sometimes it might also make sense to attach a copy of the purchase order.

Packling-Slip-for-Subcontractor-Shipment-Dynamics-NAV

When you are shipping the transfer order you might as well also at the same time receive it into the subcontracting location or alternative you can have a procedure where you get a confirmation from the subcontractor that they have received the parts and then go to Dynamics NAV and receive the transfer order. Either way will work, but it has to be received before it later can be consumed.

Using MRP to Create the Transfer Orders

Being in a manufacturing environment you probably use the MRP functionality in Dynamics NAV to create production orders based on planning parameters and demand. If so, it makes sense to setup the system to also create the related transfer orders automatically. You do this by creating a stockkeeping unit for each of the components at the subcontracting location (in this case just the bicycle) and set the Replenishment System as Transfer and the Transfer-from Code being the BLUE location (where you ship the components from).

Transfer-Stockkeeping-Unit-Dynamics-NAV

You can setup the planning parameters the way you want, but in most cases it makes sense to ship a quantity that is equal to the demand, so the Reordering Policy should be either Order or Lot-for-Lot. We will set it to Order in this case.

Reordering-Policy-Stockkeeping-Unit-Dynamics-NAV

You also need to setup a transfer route from the BLUE location to the subcontractor location (if not you will not be able to setup the above stockkeeping unit with the replenishment system as transfer). The shipping agent and shipping agent service on the transfer route will define the lead time for the transfer itself (e.g. the difference between the shipment date and receipt date on the transfer order).

Transfer-Route-Dynamics-NAV

Now when you run MRP you will get not only a suggestion to create a production order but also a suggestion to create the transfer order to send the required components to the subcontractor. The due date of the transfer order will be the order date of the production order.

Transfer-In-Planning-Worksheet-Dynamics-NAV

Accepting the above will create all the required orders and will trigger a request to the warehouse to process the shipment of the components to the subcontractor when the transfer order is released.

Nice! :-)

This is it! Quite straight forward and simple I think. I have used this method many times and it works like a charm.

You should be aware of that it assumes that you don’t have consumed the components earlier in in a previous operation. Then they are in WIP and you have nothing to ship. If you have that process it might (not always) make sense to create separate items numbers and divided the manufacturing process into two different production orders, this way you will be able to do the shipment and get the full traceability of what happen with the product.

You can also setup the components to be backflushed based on the subcontracting operation, this way if you receive 8 pieces of the FIFA 2014 bicycles back from the subcontractor, Dynamics NAV will automatically consume 8 pieces of the regular bicycle from the subcontractor location. This will require using the routing link codes, but will eliminate the step to post the consumption manually. See the flushing methods post for more details about backward flushing.

Olof Simren - Freelance Microsoft Dynamics NAV Expert


Subcontracting Part 3: Transport Charges

$
0
0

This is the third post in a series of subcontracting blog posts, and it starting to get a bit tricky. The topic is how to handle transport charges for subcontracting operations. In other words if you have a vendor that handles parts of the production process and you receive an invoice from a shipping agent/transportation company for the transportation of products either to and/or from the subcontractor.

If you haven’t read part 1 and part 2 it might be a good idea to read those first, this post assumes you know the basics of subcontracting and uses the same items as an example.

There are three ways that I have successfully done this in the past, all of them with some pros and cons;

1. Item Charge on a Purchase Invoice against the Transfer Receipt.

2. Adding a separate Subcontracting Operation to the Routing.

3. Adding a Transportation Cost Accrual Operation to the Routing.

Each method is described in details below.

Item Charge on a Purchase Invoice against the Against Transfer Receipt

In this method you create a purchase invoice based on the invoice received from the transportation company and you assign the cost against a previously posted transfer receipt. It handles the actual costs only and will not affect any standard cost roll-up, so it is a method that is more applicable to the FIFO or average costing methods.

To do this you need the transportation company as a vendor in Dynamics NAV (obviously), and you also need an item charge setup to handle transportation costs. A prerequisite is also that you used a transfer order to send the components to the subcontractor (like described in my post subcontracting part 2) or a transfer order to move the finished product back from the subcontractor. Without a posted transfer receipt this method will not work.

Here is how you do it;

Create a purchase invoice representing the transportation costs and add the item charge(s) as lines according to the invoice received.

Transport-Cost-Purchase-Invoice-Dynamics-NAV

Next you assign the item charges to the transfer receipt(s) by selecting Line -> Item Charge Assignment and then using the Get Transfer Receipt Lines to select the transfer receipts to assign the cost to.

Item-Charge-Assignment-Dynamics-NAV

If you get a transportation cost invoice covering multiple shipments (maybe throughout the month) then you need a way to distribute the costs across the different transfer receipts (instead of entering the Qty. to Assign manually). Standard Dynamics NAV can help you with this by suggestion a distribution according to the amounts of the products or equal across the lines.

Item-Charge-Assignment-Suggestion-Dynamics-NAV

This suggestion can also be easily customized to include other criteria such as weight. You also need to be aware of how the dimensions in item charges are handled, read my previous post related to this.

Then you post the purchase invoice and after running the cost adjustment you see that Dynamics NAV forwards the costs applied like this to any inventory value or COGS for the finished product produced through the subcontractor on the production order.

Nice!

Adding a separate Subcontracting Operation to the Routing

The second option is to add a separate subcontracting operation to the routing. By doing this you will be able to define an expected cost that could also be part of a standard cost roll-up and you will get a second purchase order to be used for invoicing the transportation cost. This method can also be used even if you are not transferring products using transfer orders.

To do this you need a vendor for the transportation company (obviously), but also a work center so that it can be added to a routing as an operation. The vendor, work center and routing can be setup as any other subcontracting operation. See subcontracting part 1 for details.

The routing for such could for example look like below, where the expected transport cost is defined as $3. Note that the operation is without any times, it’s purely to create a purchase order in order to incorporate the transport charges into the cost of the finished product.

Routing-With-Freight-Charges-Dynamics-NAV

When you then create your purchase order for the subcontracting trough the subcontracting worksheet you also get a second purchase order in the suggestion.

Subcontracting-Worksheet-Freight-Charge-Dynamics-NAV

The second purchase order is for the transportation costs and will stay open to be match with the transportation cost invoice when received. It is linked to the operation on the production order the same was a regular subcontracting purchase order.

Freight-Charge-Purchase-Order-Related-to-Production-Dynamics-NAV

This is a quite straight forward way of doing it, it works well in a standard cost environment (as well as FIFO and average) and there is no prerequisite of having to use a transfer order to ship of receive products from the subcontractor.

The downside of this method is if you receive invoices from the transportation company that covers multiple shipments, such as a monthly invoice, then this will be a bit hard and cumbersome.

Adding a Transportation Cost Accrual Operation to the Routing

The last method is to setup a separate operation in the routing that will add some costs that represent the expected transportation costs. By configuring this correct way you can get Dynamics NAV to automatically post the transportation costs against an accrual account when the production order is finished. The accrual is then later reversed when the invoice is received from the transportation company.

What you need for this method is a work center to handle the accrual posting. The work center should be setup with a separate posting group to control the general ledger account, and the flushing method should preferable be setup a backward flushing (so it does not add any additional steps to the operation to complete the production order).

This is how to do it; setup the work center with the Unit Cost Calculation equal to Units and the Specific Unit Code checked (just like a regular subcontracting work center). Set the Flushing Method to Backward to have Dynamics NAV to automatically finish the operation and apply the cost. Use a General Product Posting Groups that is specifically created for this purpose.

Transport-Cost-Work-Center-Dynamics-NAV

The posting setup is then done to post the cost into an accrual account for transportation costs.

General-Posting-Setup-Dynamics-NAV

We then add an operation using this work center to the routing where we specify the estimated transportation cost in the Unit Cost field.

Routing-With-Transport-Charge-Dynamics-NAV

Dynamics NAV will then automatically credit the freight accrual account according to the amount specified in the routing when the production order is changed to finished. See Production Order Posting to General Ledger for more details about how Dynamics NAV posts into the GL from production.

When the transportation cost invoice later arrives in the end of the month, you simply post this against the accrual account, which will create a debit transaction and reverse the accrued transport costs.

Transport-Cost-Purchase-Invoice-2-Dynamics-NAV

What remains in the accrual account in the end of the month (in case of differences between expected accrued costs and actual invoiced costs) need to be cleared manually through journal entries (probably move to some kind of variance account in the P&L).

This method is useful if you are receiving transportation costs invoices that span multiple production orders. It is also an easy method to maintain since it does not add much of work, all that needs to be done is to add the extra operation to the routing and the rest is handled by Dynamics NAV automatically.

That’s it for transportation costs related to subcontracting. If anyone has other methods to do this (maybe better ones) feel free to post a comment.

Upcoming blog posts about subcontracting will describe how to use warehouse receipts for subcontracting, how things can be simplified with some small code changes and how to setup Dynamics NAV when you are performing subcontracting on behalf of a customer.

Make sure to subscribe to not miss anything. :-)

Note that I also have a Twitter account now where you can follow me: @microsoftNAV

Olof Simren - Freelance Microsoft Dynamics NAV Expert

Subcontracting Part 4: Warehouse Receipts

$
0
0

This is the fourth post related to subcontracting in Dynamics NAV. The topic is how to use warehouse receipts together with subcontracting purchase orders (previous parts are here: Part 1, Part 2, Part 3).

It is a quite common requirement to be able to use the warehouse receipts to process receipts of subcontracting purchase orders. It could for example be that your location is setup to use the ‘Directed Put-Away and Pick’ (sometimes referred to as advanced warehousing) and therefore you are required to use the warehouse receipts or it could simply be that the warehouse receipts are used standalone and you want your receiving personnel to receive subcontracting purchase orders the same way as they are receiving regular purchase orders (and transfer receipts and sales return receipts).

In standard Dynamics NAV it is only possible to receive inventory on purchase orders through warehouse receipts. A purchase order with just a subcontracting operation on the line does not even create a warehouse request.

This is how it is (and always have been) in Dynamics NAV. But Microsoft has also (many years ago) provided a solution that can enable the warehouse receipts for subcontracting purchase orders (don’t ask me why this is not part of standard Dynamics NAV). It is at PartnerSource as article 916968 for Navision 4.0, but it still applies to version 5, 2009 and 2013.

The way it is suggested to do it is as follows:

Add a Boolean field called Subcontracting to the warehouse receipt line table (you might also want to add it to the page as an indication to the user, then make it non-editable).

Subcontracting-Field-in-Warehouse-Receipt-Line-Dynamics-NAV

It also makes sense to add the above field to the posted warehouse receipt table to be part of history after the receipt has been posted.

Then make the following two changes to codeunit 5750 (Whse.-Create Source Document).

Change-to-Codeunit-5750-Dynamics-NAV

The above change is to be able to insert the purchase line on the warehouse receipt.

2nd-Change-to-Codeunit-5750-Dynamics-NAV

The above change is to insert a 1 in the quantity per unit of measure field in the warehouse receipt table instead of the 0 value that is on subcontracting purchase orders and also to set the Boolean subcontracting field that will be used later when posting the receipt.

Then also do the following two changes to codeunit 5760 (Whse.-Post Receipt).

Change-to-Codeunit-5760-Dynamics-NAV

The above change is in order to only post inventory transaction if the Boolean subcontracting field is false. In other words don’t post inventory transactions when receiving a subcontracting purchase order since you are not really receiving inventory (just finishing the operation).

2nd-Change-to-Codeunit-5760-Dynamics-NAV

The above change is to not create a put-away document for received subcontracting purchase order.

The third and last codeunit to change is codeunit 5772 (Whse.-Purch. Release). This is so that a warehouse request is created even for subcontracting purchase orders. Without the warehouse request you will not be able to retrieve the purchase line into the warehouse receipt.

Change-to-Codeunit-5772-Dynamics-NAV

That’s it, time to test it! :-)

We create a subcontracting production order on the WHITE location in a Cronus database (which as you might know is a location setup to use ‘Directed Put-Away and Pick’). In my example I will use the FIFA painted bicycle also used in Part 1, Part 2 and Part 3.

Subcontracting-Production-Order-On-Warehouse-Location-Dynamics-NAV

We then use the subcontracting worksheet to create a purchase order on the WHITE location, which is released and sent to the vendor along with the parts.

Subcontracting-Purchase-Order-Dynamics-NAV

The next step is then to receive the purchase order when the material is returned from the subcontracting. To do this we create a new warehouse receipt and use the Get Source Documents function to retrieve the purchase order line (see blog post about how to work with warehouse receipts).

The purchase line is retrieved and the field Subcontracting is checked on the line. This way the receiving personnel can verify that this is a subcontracting purchase order that they are about to receive and they also know that no put-away will be created.

Warehouse-Receipt-Dynamics-NAV

The receipt is confirmed by posting it.

The subcontracting purchase order has now been received.

Subcontracting-Purchase-Order-Received-Dynamics-NAV

And the operation on the production order has also been updated accordingly and the capacity ledger entries has been created, just like it would if we were receiving directly on the purchase order.

Subcontracting-Capacity-Ledger-Entries-Dynamics-NAV

Nice! :-)

With this modification the receiving personnel can receive subcontracting purchase orders the same way as regular purchase orders (with the exception that you don’t get a warehouse put-away). This is great and I think a lot less confusing compared to having to have separate procedures for receiving subcontracting purchase orders or to use a different location just to work around the issue.

Olof Simren - Freelance Microsoft Dynamics NAV Expert

Subcontracting Part 5: Perform Subcontracting

$
0
0

This is the fifth post on my blog related to subcontracting in Microsoft Dynamics NAV. It describes how you can setup and use Dynamics NAV when you are performing subcontracting on behalf of a customer (e.g. if you are a subcontractor for a customer and perform operations on parts belonging to the customer).

This is actually quite straight forward. The key is to create separate items that represent the customer’s parts. Whatever is received from the customer as components should not have an inventory value and whatever is sent back to the customer should have a value representing the value your process has added to the parts (material, labor, etc..).

The receiving of parts can be done using a purchase order with a zero value (or alternative a sales return order), the actual operation(s) are done using a production order and sending the parts back to the customer is done using a sales order (as well as invoicing for the work performed).

Here is how it can be done.

First we setup the parts that should be involved in this process. Let’s use the same example as the previous blog posts about subcontracting; a standard bicycle that gets a custom FIFA 2014 pain job by a subcontractor (which in this case is yourself).

First we need the standard bicycle that is going to be received from the customer. We can set this item up as any other type of item with the exception that the inventory value should always be zero since the inventory belongs to the customer. We use the Inventory Value Zero feature to define this, see previous blog post for more details about this. For the item number I have in this example used the same number as a regular bicycle but with a ‘C’ as a prefix to indicate that it is a consignment inventory that belong to a customer.

Inventory-Value-Zero-Dynamics-NAV

Next we need the paint to pain the bicycle, this is our own inventory and it is setup like any other item, nothing strange here (I use the Cronus item 70100).

Paint-Item-Dynamics-NAV

The last item we need in this example is the finished painted bicycle that is sent back to the customer. This item should have an inventory value that represents the cost of the pain and the capacity cost that is applied during the production process (which it will get by default from the production BOM and routing).

FIFA-2014-Bicycle-Item-Dynamics-NAV

This part needs a production BOM and routing since this is what we are going to produce. The production BOM is setup as below, where we use one of the consignment bicycles and half a can of paint for each bicycle that is painted.

Production-BOM-Dynamics-NAV

The corresponding routing for the item is defined as below (with just a painting operation that is backflushed when the production order is finished).

Routing-Dynamics-NAV

If you are in a standard cost environment then you can now do a cost roll-up of the FIFA 2014 painted bicycle. The costs in this example then turned out as follows (based on the material in the production BOM and operations in the routing).

Roll-Up-Costs-Item-Card-Dynamics-NAV

The above fields has been added to the item card, see Cost Roll-Up Details on Item Card for more details.

Now we have the items needed.

We also need a customer, and if we are going to receive the unpainted bicycle trough a purchase order or do any kind of replenishment planning on it we also need to setup our customer as a vendor.

The customer is setup like any other customer, nothing strange.

Customer-Card-Dynamics-NAV

The vendor can then be created from the contact that is linked to the customer, this way the address etc.. will be kept in sync. by Dynamics NAV (see Connect Customer with Vendor for details).

Vendor-Card-Dynamics-NAV

Now we have what we need. Let’s try the process. :-)

It starts with the customer places an order to have some bicycles painted in the FIFA 2014 paint. We then create the corresponding sales order in Dynamics NAV where we enter the painted item on the sales order line. The price is what we are going to charge for the service we are providing (e.g. painting) and any material that is going to be used (e.g. the paint).

Sales-Order-Dynamics-NAV

From here we can then create the production order to perform the work using the sales order planning feature (or alternative to have MRP to create it).

Order-Planning-From-Sales-Order-Dynamics-NAV

And we also create a purchase order with the parts that we expect to receive from the customer (this you could also get MRP to create for you). The purchase order will have zero in the purchase amount.

Purchase-Order-Dynamics-NAV

We then receive the purchase order and close it by invoicing it with the zero value when the products are received from the customer.

The work of painting the bicycles is  performed and the production order is finished by posting the consumption of the bicycles and paint and by posting the output of the operations. In this case I set it all to be backward flushed, both the components and all operations, so all that is needed is to change the status of the production order to finished).

We now have the finished FIFA 2014 painted bicycles in inventory and can ship it back to the customer and invoice for the work performed. This we can do from the sales order (or whatever method you chose to ship and invoice sales orders).

This is it, straight forward and quite simple I think. :-)

When you later look at the statistics of this product (to determine how much profit you make on the part etc.) you will see the cost as the cost that you added to it and the sales amount is what you invoiced the customer for the services and additional material you used. And if it is a standard cost part you could also have a variance when the production order is finished.

Olof Simren - Freelance Microsoft Dynamics NAV Expert

Work Centers vs. Machine Centers

$
0
0

A topic that is discussed on all manufacturing implementations is Work Centers vs. Machine Centers. Questions like ‘should we be using machine centers?’ and ‘what are the differences?’ are always raised and discussed.

It is very important to understand the differences and how to apply the functionality in Microsoft Dynamics NAV. I have seen several installations where the setup has been much more complicated than it needed to be and therefor the system became hard to work with. I have also seen cases where standard functionality that could have added lots of value was not utilized and even modifications being done that could have been handled by standard functionality.

This blog post is a write-up to outline what to consider when setting up work centers and potentially machine centers in order to get the most out of your Dynamics NAV solution. It is divided in three main sections; the overall concept, some sample setups of the different hierarchies and the differences in functionality.

Overall Concept

The overall concept is a hierarchy where the top level are work center groups, within each work center group there are work centers and each work center can have one or many machine centers.

Work Centers and Machine Centers

You schedule your production against either work centers or machine centers. The machine centers are optional and not always needed (actually most of the times the machine centers are not needed) the work center groups are mandatory by not used for much else other than grouping of work centers from a capacity reporting point of view.

When you setup your routings you define what work center or machine center the operation should take place in. Dynamics NAV then allocates the capacity towards those accordingly when production orders are planned and created. When using machine centers you have the option to say that the calendar of the work center should be the total of the machine centers calendars or if it should have its own calendar.

Sample Setups

Below is a sample of how the work centers and machine centers can be setup in Dynamics NAV. With the option to say that the machine centers calendars should consolidate into the work center or not you basically have three main configurations; A. Work Centers without Machine Centers, B. Machine Centers with Consolidated Calendar and C. Machine Centers without Consolidated Calendar.

Below are the three setups described one by one using a made up hierarchy (illustration below) with 4 work centers within a plant where two of the work centers are using machine centers. Of the two work centers with machine centers one of them is without the consolidated calendar and the other one with.

Work Centers and Machine Centers Sample

A. Work Center without Machine Center

There are two work centers without machine centers; one is a final assembly area where employees are working in their own cells with assembling products and the other one is an extruding area with multiple extruders.

The final assembly work center is setup to represent man hours, the calendar is defined according to the shifts that the employees are working and the capacity field is setup to the number of employees that is typically working in the final assembly area (in this case 10). The capacity field is a key field that defines how many production orders that can be worked on at the same time in a work center and it is used by Dynamics NAV to multiple the capacities defined in the calendar.

Final-Assembly-Work-Center-Dynamics-NAV

The above work center is setup with a calendar that represent 1 shift working 5 days a week, 8 hours a day. When the calendar is generated Dynamics NAV adds 80 hours per day available capacity (8 hours per day times 10 employees) (note that I left the efficiency to 100%, otherwise the available hours per day will be adjusted accordingly).

Final-Assembly-Work-Center-Calendar-Dynamics-NAV

When scheduling production orders the system knows that the capacity is 10 and will not schedule more than 8 hours per day for a single operation. This because it assumes that a production order only occupies 1 capacity at a time (e.g. in terms of an assembly work center with employees this equals to each employee working on their own production order). If you want Dynamics NAV to schedule more than one capacity for an operation then this can be accomplished with the concurrent capacity field in the routing, this is described in one of my previous blog posts, Production Lead Time using Routings, so I will not go into the details of that.

The extruding work center is setup to represent 4 extruders that are working independent of each other. This is achieved using the capacity field (just like for the final assembly work center). This work center is then machine hours and not man hours, there could be one employee running 4 extruders and the calendar should represent the time the extruders are available because that is what is being planned on in this case (which is very typical).

Extruding-Work-Center-Calendar-Dynamics-NAV

The calendar and the way that Dynamics NAV plans production orders on this work center is the same as on the final inspection work center. The example with the extruders is here just to indicate that the capacity field also works on scheduling machines (not only employees).

Setting up work centers without machine centers and using the capacity field to define the number of machines or employees in the work center is by far the most common way to use the manufacturing functionality in Dynamics NAV (at least in my mind). For most companies it is enough to see the capacity at a work center and know what has been allocated towards it without knowing exactly in what extruder or what employee that is assigned to the different production orders.

From an execution point of view this works quite well by the employee or machine just starting on the next production order allocated towards the work center when becoming available using a common task list. A task list for the extruders could for example look like below where the specific extruder to run the production order on is not listed (just the work center) with multiple production orders overlap on the same day (running concurrently on 4 different extruders). The employee then decides what extruder to run what production order on.

Extruder-Task-List-Dynamics-NAV

You can obviously also have work centers setups to represent a single machine or employee. You could for example have four extruding work centers (one for each extruder). This is only recommended if there is a difference in the work centers; if they are identical then setting up multiple of them would complicate the creation of the routings since you there have to pick which one that would be used by Dynamics NAV as the default one for creating production orders and scheduling tasks.

B. Machine Centers with Consolidated Calendar

The next option is to have machine centers that together make up the calendar for the work center. This option is valid if the machine centers are similar and can provide the same kind of work (e.g. if a machine is down the work center is still functional just with less capacity).

In this example we have a cutting work center that consists of two cutting machines. The work center is setup with the consolidate calendar option activated. This basically means that the work center calendar gets calculated based on the machine centers and their capacities (e.g. the work center gets the same capacity as the total capacity of all the machine centers, the capacity and efficiency fields on the work center is then not used by the system). With this method you can review the load both on each individual machine center and as a total for the work center.

Cutting-Work-Center-Calendar-Dynamics-NAV

Each cutter then gets its own machine center with the capacity set to 1. Note the work center no. field that links it to the work center and the fact that there is no shop calendar code on the machine center (the machine centers inherits the shop calendar code from its work center). Also note the routing setup fast tab where default values for the routing can be specified (this is something that you don’t have with work centers and it is kind of nice).

Cutter-Machine-Center-Dynamics-NAV

When you create your routing for operations that take place on work centers like this you have the option to create it with a specific machine center or with the more generic work center. This option is very useful, you could for example have all the routings defined with the cutting work center which Dynamics NAV then uses for the initial scheduling and creation of production orders (yes NAV considers the production orders scheduled on the machine centers as a load on the work center as well in this case). Once the start date of the production order gets closer a user can go through the task list on the work center and assign the tasks to the individual machine centers using a move function. The move function let a user select a machine center within the work center to move an operation to.

Move-Function-Work-Center-Task-List-Dynamics-NAV

The tasks left on the work center are then tasks that are due to be assigned to a machine center (since they fall of the task list of the work center when they are moved to a machine center).

The load on the work center still shows the total allocated time even if the task is moved to a machine center. Drilling into the allocated qty. field then shows the details about if the time allocated is towards the work center (e.g. non-delegated operation) or towards a machine center.

Work-and-Machine-Center-Load-Dynamics-NAV

So this way you can manage the load on two levels; as a total on the work center or for each individual machine centers.

This scenario with using machine centers which calendars consolidate to the work center is quite useful in my mind and applicable where there are multiple similar machines that need to be planned individually with each of them having their own task list.

You can obviously also have the machine centers directly in the routings, and also move tasks between machine centers.

C. Machine Centers without Consolidated Calendar

The last option is to have a work center defined with machine centers that are set up individually without having their calendars consolidate into the work center.

In this example it is a molding work center that consists of a grinder and two molding machines (the grinder is grinding the material for the molders). The work center is setup as a regular work center but with the efficiency set to 0. You set the efficiency to 0 if you don’t want the work center calendar to make any contribution to the total capacity of the work center, which you typically don’t want. All you need to be aware of here is that with the efficiency set to 0 you can’t calculate the calendar on the work center (which actually is a good thing and not needed).

Molding-Work-Center-Dynamics-NAV

The machine center for the grinder is setup according to below (same as in option B described above).

Grinding-Machine-Center-Dynamics-NAV

The two molding machines are setup similar to the grinder but with the capacity equal to 2.

Molding-Machine-Center-Dynamics-NAV

Now when you create your routings, for which you use the machine centers to define the operations, in the case below we first grind the material and then it gets molded.

Molding-Routing-Dynamics-NAV

So, why not only have a single work center called molding and use that instead for both operations? Good question! It would definitely be easier; but if you have the requirement to schedule the grinder and molding machines separately or to have different costs associated with them, then machine centers might be the way to go (maybe not all items needs to be grinded, some might go directly to the molding machine).

So, why not have the grinder and the two molders as two different work centers? Another good question. :-) The machine centers are slight simpler to setup (since they inherit the shop calendar code, dimensions, etc. from their work center) and the work center provides a way to group the machine centers that belong to each other. There are also some machine center specific functionalities that could be applicable and provide some value. This leads me to the next part of the blog post.

Differences in Functionality between Work Centers and Machine Centers

When you decide how to setup the work centers and machine centers in Dynamics NAV you also need to be aware of the slight differences there are in terms of functionality when it comes to the following:

1. Shop Calendars

2. Moving Tasks

3. Scrap % and Scrap Codes

4. Routing Setup

5. Dimensions

Those are described in more details below;

Shop Calendars

The shop calendar codes are only on the work centers, it is assumed that all machine centers within a work center use the same shop calendar. In other words; machine centers does not have their own shop calendars. This also could be seen as a way to simplify the setup and maintenance of machine centers.

Move Tasks

The task lists in Dynamics NAV has a move function that allows you to move an operation to a machine center. You can move operation from a work center to a machine center and between machine centers but you cannot move an operation to a work center.

When moving an operation to a machine center the setup time is adjusted according to the setup time defined on the machine center. This way different machine centers can have different setup times and moving an operation could adjust the production lead time.

This in conjunction with the consolidated calendars described above is in my mind the biggest functionality gain from using machine centers.

Scrap % and Scrap Codes

There is a slightly difference in how scrap can be handled between work centers and machine centers; a scrap % can be defaulted on machine centers but not on a work center (for work centers you need to enter it on the individual routings). You also have the option to assign a scrap code when posting output on a machine center while if you want this option on a work center you need to do a minor modification. See my previous post related to Scrap in Production.

Routing Setup

On machine centers you can default some of the routing times on the routing setup tab (like the setup time, move time, wait time), this you can’t do on the work centers. If you use work centers then you will have to enter those on the individual routings. I guess the logic behind this is that a work center should be more generic and therefor the times would be more unique to what is performed, while a machine center is more of a specific machine(s) and therefor has the potential to be defaulted onto the routings.

Dimensions

Machine centers does not have their own set of dimensions, instead the operations posted against a machine center inherits the dimensions from the work center it belongs to. This I guess is ok since most of the times the dimensions defined work centers are something like a department or similar, and that would probably also apply to the machine centers within a work center. If you want to know more about dimensions on production orders read my previous blog post Dimensions on Production Orders.

Summary

I hope the above clarifies things in relation to work centers vs. machine centers and when to choose what method of configuring the manufacturing resources in Dynamics NAV. Keeping things as simple as possible is often a good strategy and in my experience using work centers only is sufficient in most manufacturing implementations.

Olof Simren - Freelance Microsoft Dynamics NAV Expert

Maintenance Production Orders

$
0
0

A way to handle maintenance on machines in Microsoft Dynamics NAV is to create production orders with operations that represent the maintenance. The beauty of this is that you can then include the maintenance when scheduling the production orders, you also maintain history about when the maintenance was done and you have the option to capture the labor cost related to maintenance.

Below is an example of how it can be done.

Assume we want to be able to schedule maintenance on a cutting machine (I use the same machine center setup as in my previous blog post Work Centers vs. Machine Centers). For this I create a separate item, I give it the item number ‘MAIN-CUT’ and a description ‘Maintenance on Cutting Machine’. The only purpose of this item is performing maintenance on the cutting machine(s).

Maintenance-Item-Card-Dynamics-NAV

It should not have any inventory value assigned to it, unfortunately setting the inventory value zero checkbox on the item card does not work for manufactured items, so the other option is to set it up with the costing method as standard cost and with 0 as the cost.

Maintenance-Item-Card-Costing-Method-Dynamics-NAV

If you want to capture the labor cost related to the maintenance then the labor cost will all be posted into the P&L as a variance since the standard cost of the item is 0. For analytical purpose it then makes sense to also add a dimension value to the item that tags the g/l entries as maintenance related. Normally you have some kind of item group or product category dimension already for items, if that is the case you just have to add a value for maintenance and setup the item to use this dimension value (read more about dimensions on production orders).

Maintenance-Default-Dimension-Dynamics-NAV

Next we need to define a routing to go onto the maintenance production order. Too keep this simple we just create one with the same number as the item and add one operation on the CUT work center on the on the routing line. For the operation we can add standard tasks, tools, comments, etc. just like with regular routings. I define the setup time as 3 hours since that is what the maintenance will take.

Maintenance-Routing-Dynamics-NAV

Now we have what we need. Correct, there is no need for a production BOM. You could add one if you plan to use some inventory during the maintenance, but in this case we will do it without.

Now you can create maintenance production order as you want (don’t forget to link the routing with the item first). Maybe you want to do maintenance once a month and create them all for the year, or you just want to create them as needed.

You create the maintenance production order same way as if you would create a regular production order manually (e.g. enter the item number, quantity, due date and location then refresh). Typically you want to create it with a quantity of 1.

Maintenance-Production-Order-Dynamics-NAV

Now the maintenance production order will show up on the task list among the regular production orders. You can release them, load your shop floor, move them around, etc. the same as regular production orders. The load on the work/machine center will include the maintenance order and the available capacity will be reduced accordingly. Nice! :-)

Work-Center-Load-Dynamics-NAV

The job card can contain the instructions entered on the routing (or if you enter additional information on the production order itself), just like regular production orders, nothing magic about this.

The maintenance production order is also completed the same way as you do your regular production orders (through the output journal, production journal, a barcode system, etc..). This is kind of nice as well since you don’t need separate procedures or instructions for this.

What you then see in the general ledger is the labor cost related to the maintenance being posted onto the variance accounts with the maintenance dimension value.

Maintenance-Cost-In-PL-Dynamics-NAV

You see in the capacity ledger entries when maintenance was last done on the work/machine centers. And if you want to take it even further you can enter maintenance information or link documents to the production order (to have a complete record of the maintenance accessible from Dynamics NAV).

This is to me an easy way to manage (schedule and record) maintenance within standard Dynamics NAV.

Note that you will end up with some inventory without a value on the items, so this is something you want to adjust out periodically (don’t want to confuse people during stock counts :-) ).

Olof Simren - Freelance Microsoft Dynamics NAV Expert

Alternative Production BOMs and Routings

$
0
0

Using alternative production BOMs or routings is quite common in a manufacturing environment. It could for example be that larger orders are run in higher capacity machines, versions of products are produced with slight variations in components (like different colors), or you might produce the same item in two different locations and therefor need two different routings. These are just some examples, there are many more scenarios like that where you might need to change the production BOM or routing based on different factors.

Microsoft Dynamics NAV allows you to manually change both the routing and production BOM used on each individual production order. This blog post describes how this is done manually and also how you can automate the process with some relative simple modifications. If you frequently are changing production BOMs and/or routing on production orders then automating it would be an alternative (kind of a requirement if you run MRP and want accurate suggestions).

In the examples below I will use a bicycle that is produced in two different locations and in different colors. The different colors are managed using variant codes on the item like below (blue and red color bicycle).

Variants-Codes-On-Item-Card-Dynamics-NAV

The bicycle has a standard production BOM and a routing that represent how it is typically produced (and it is also the ones that is used in the standard cost roll-up). Those are what are selected on the item card for the bicycle.

Item-Card-BOM-Routing-Dynamics-NAV

In addition to this I have create two alternative production BOMs for the two different colors; 1000-BLUE for a blue bicycle and 1000-RED for a red bicycle. They share the same components except for the paint component (blue paint in one and red in the other).

Production-BOM-Blue-Bicycle-Location-Dynamics-NAV

For the routing I have an alternative routing created for producing the bicycle in my TAMPA location. This alternative routing have a different work center and a different operation.

Routing-TAMPA-Location-Dynamics-NAV

That should be what is needed in terms of setup.

Manually Change Production BOM or Routing

Now when a production order is created it will always use the production BOM and routing from the item card, to manually change this you just select an alternative on the production order line and then refresh the component and/or operations. Below I changed the routing no. from 1000 to 1000-TAMPA.

Change-Routing-BOM-On-Production-Order-Line-Dynamics-NAV

When you refresh the production order after you have changed the production BOM or routing then remember to uncheck the Line option, otherwise the field you just changed will be set back to the standard values.

Refresh-Production-Order-Dynamics-NAV

Now the components and routing on the production order will be according to how the alternatives are setup. Simple and easy.

Note that you can also change the components and/or the routing manually on individual production orders as well without changing the production BOM no. and routing no.  on the production order line. This might be the more common way of doing it if the change is due to an exception (like a machine that is down, or a component that is missing).

Automatically Change Production BOM or Routing

Now to the fun stuff! :-)

If you want Dynamics NAV to automatically select a production BOM or routing based on criteria like order quantity, location or variant code then this is relatively easy to do with a customization. Below is a suggestion of how to do it.

We need a setup to define the criteria for the alternative BOMs and routings. For this I create two new tables, one called Alternative Prod. BOM and the other called Alternative Routing. You could potentially do it with one table, but this is how I did it in this case (having two different tables could be an advantage from a permissions point of view, if you for example have engineers that are maintaining the BOMs and manufacturing people maintaining the routings then you probably want it separated).

The primary key for both the tables are Item No., Variant Code, Location Code, Min Order Size and Max Order Size. What fields you put in the tables depends on what logic you want NAV to use when selecting the alternatives.

The alternative Prod. BOM table is according to below. I have entered a setup to link the two production BOMs to the item and its variant codes.

Alternative-BOMs-Dynamics-NAV

The alternative Routing table is according to below. I have entered a setup to link the alternative routing to the TAMPA location for item 1000.

Alternative-Routings-Dynamics-NAV

You can potentially add the above tables to the item list and card like below, so that users can easy access them from an item.

Alternative-BOMs-Routings-Item-Card-Dynamics-NAV

Now we need to write the logic for NAV to select the correct alternative. The logic is going to be used both when new production orders are created manually and when the planning worksheet is generated as part of MRP. If I know that something is going to be used in multiple places I typically place the code in a separate codeunit (instead of create new functions in each of the objects with the same kind of code). In this case I created an Alternative Prod. Mng codeunit where I placed two functions, one for retrieving the production BOM and one for the routing.

Alternative-Production-Management-Dynamics-NAV

The functions above are self-explained I think, they basically returns the production BOM no. or routing no. based the parameters it is called with. If no alternative is found then the standard one from the item record is returned.

Now we have the tables where we do the setup and the functions to select and return the production BOM no. and routing no.. Next we need to place some code in the standard objects where the production BOM and routing is going to be selected.

The object to change is the prod. order line table, this is where the standard Dynamics NAV code for retrieving the production BOM no. and routing no. from the item record exists. We changes this so that the new functions in the codeunit above is used instead. This is the in the OnValidate trigger of the item no. field in that table. The code needs to be changed in two places according to below.

Code-Change-Prod-Order-Line-Table-Dynamics-NAV

The above code change is all it takes to have production order that are refreshed to use the alternative production BOMs and routers. If you also want the same logic to happen if a user manually changes a production order line you need to insert the same code into the OnValidate triggers of the fields that are included in the logic. Wrap the code with ‘IF CurrFieldNo = FIELDNO(“Variant Code”) THEN BEGIN’ to not get a crazy circular reference. Something like below.

Code-Change-Prod-Order-Line-Table-2-Dynamics-NAV

This should be it for the production orders that are created manually. Next we do similar changes to the MRP suggestions.

To do this we need to change the requisition line table. The change to the code will be very similar to what was done above to the prod. order line table. In this case it is in the OnValidate trigger of the replenishment system field where we basically replace the places where NAV retrieves the production BOM no. and routing no. from the item record with the new functions in the codeunit. Something like below.

Code-Change-Requisition-Line-Table-Dynamics-NAV

And just like with the prod. order line table, if you want Dynamics NAV to automatically update the production BOM and routing if a user manually makes changes to the MRP suggestions in the planning worksheet then you will have to add code on those fields that are included in the logic, like below.

Code-Change-Requisition-Line-Table-2-Dynamics-NAV

This should be all, time to test it! :-)

I create a new production order for 10 bicycles by entering the item no., due date, location code, and quantity and then hit refresh. I can see that a production BOM and routing is selected on the line and it seems to be as expected (the standard ones).

Production-Order-Standard-BOM-Routing-Dynamics-NAV

Now I change the location code of the production order to the TAMPA location and refreshes the entire production order. The routing on the line changes accordingly. Nice! :-)

Production-Order-Alternative-Routing-Dynamics-NAV

Next I change the variant code on the line to be the blue bicycle variant and you can see the production BOM changes. You also need to recalculate the components after this (Dynamics NAV does not have a variant code in the header of a production order, which is a bit strange in my mind, but off-topic for this post).

Production-Order-Alternative-BOM-Dynamics-NAV

The production order all seems to work fine. We also need to test the MRP suggestion. This can be done by setting up some SKUs with some planning parameters, running the plan and look at the suggestion. In this case I create 4 SKUs (blue/red variants on two different locations) with reorder point higher than the projected quantity on hand.

SKUs-For-Bicycles-Dynamics-NAV

When I run the MRP I get the following suggestions in the planning worksheet, where the production BOMs and routings are selected based on my criteria. Sweet! :-)

Planning-Worksheet-Alternative-Production-Dynamics-NAV

Just to be safe you should also check the planning components and planning routing to confirm that they are according to the production BOM and routing in the planning worksheet. This is what will drive the demand for the components and the allocation towards the work centers.

Planning-Components-Dynamics-NAV

Planning components above looks good (the red variant gets the red pain component).

Planning-Routing-Dynamics-NAV

Planning routing also looks good (the suggestions on the TAMPA location gets the TAMPA routing).

Note that if you are using versions of production BOMs and routings then this should work as well since the code for finding the valid version is in the OnValidate triggers of the production BOM no. and routing no. fields.

Summary

As a summary I would say that if you are handling exceptions with alternative production BOMs or routings then changing them manually on individual production order would probably be fine (and this way you don’t need to do any modifications). You can also manually change individual components and operations without using any other production BOM or routing.

If alternative production BOMs or routings are frequently used, the doing some kind of modification like above would make sense (and it is not a big thing to do as you can see). The logic you build into selecting what production BOM or routing to use would be up to your business requirement.

Olof Simren - Freelance Microsoft Dynamics NAV Expert

Posting of Actual and Expected Production Time

$
0
0

When implementing Microsoft Dynamics NAV in a manufacturing environment this question is always discussed; should the time posted against production orders be according to the expected values (e.g. the setup and run times in the routings, sometimes also referred to as nominal values) or should it be according to the actual time (entered by a user)? In my mind the answer to this should be driven by business requirements and should not be determined by the functionality available in a software (just like many other things when it comes to implementing an ERP system).

My experience is that 3 out of 4 companies prefers to use the expected values and not the actual values. Most of the time the argument against using actual times are that it would be hard to capture it in a way that you can rely on the information (and base your financials on it). Things like operators that are running multiple jobs on different machines at the same time (for example) could complicate capturing how much time that are actually spent on the different operations for each of the jobs. It does not have to be one or the other either, maybe some types of operations/machines are posted with the expected values while other type of operations are being posted with the actual values.

Companies that choose to use the expected values then instead have procedures in place that keeps the expected values as accurate as possible. Those procedures could for example be to do time studies on individual operations and/or to follow up on how many hours that are posed in a period of time verses how many hours you have payroll in the same period (as an example).

Companies that choose to use actual hours are doing it to get more accurate numbers in Dynamics NAV, both in order to get realistic costs of the products and also to have a place to follow up and report on what is actually spend on the different operations (which in the long term could improve planning).

Below are some methods of capturing the actual and expected times in Dynamics NAV. The examples are described using the output journal, but the same functionality would also apply to the production journal.

Posting of Actual Production Time

When you post actual production time the user will either have to enter the time as setup/run time or enter the starting time, ending time and the concurrent capacity.

If you enter the starting time, ending time and concurrent capacity then Dynamics NAV will automatically calculate the run time for you in the journal (where the concurrent capacity represent the number of resources used). With this method there is no way to record it as a setup time, it will always be recorded as run time. The cost will be the same but if you want to do some kind of reporting on setup vs. run time then you probably want to do a small modification to allow this (maybe to add a ‘setup starting time’ field that will calculate the setup time).

Output-Journal-Actual-Time-Dynamics-NAV

One thing that is worth knowing is that if an operation starts on one day and finishes on another day, then you need to enter multiple lines in the output journal for the same operation with different posting dates (or you post the journal twice). Something like below.

Output-Journal-Actual-Time-2-Dynamics-NAV

This is a bit hard to enter in a production journal since you can’t have multiple lines in it for a single operation (without making a modification that is), but it works well in the output journal.

If you prefer to enter the setup and run times directly then you just enter this in their individual fields and you leave the starting and ending times empty.

Output-Journal-Actual-Time-3-Dynamics-NAV

Practically, posting actual times are typically either done by the operators themselves, or a production supervisor that enters the information based on filled out job cards received from the operators.

An alternative option to record actual production times is to have functionality that will record when operations are stopped and started. Programming this is actually easier that it sounds, one good/simple way of doing it is to create a transactional table where stop and start entries are recorded and then having a function in the output journal that is similar to the standard explode routing function that will populate the times based on the entries in the new table. If you use a barcode solution (like my shop floor barcode system), then you can have barcodes that are scanned to stop and start operations. If you create a page for the table and publish it as a web service you can have other application (such as a 3rd party scanning solution or a PLC system) populating it. I might actually do a future post with a solution like this.

Posting of Expected Time

If you typically produce the same quantities as on the production orders and you want to post the capacity according to the expected times from the routing, then the far easiest way to do this is to backflush the operation (something like scenario A in my previous blog post about flushing methods). If you backflush operations then there is no need to do any type of posting in the output or production journal, all you need to do is to finish the production order and the capacity and output will be posted automatically by NAV.

If you happen to be in an environment where you frequently produce quantities that are not the same as the production order quantity or if you have production orders open for a longer period of time and want to record output multiple times against the same order then backward flushing will not work. Here you need to use either the output or production journal and enter the output quantity along with the setup and run time. To streamline this task you can make a small change and have Dynamics NAV to calculate the setup and run time based on the quantity entered as output and scrap. Below is and example of how this can be done.

Create a new function in table 83 – Item Journal Line, call it something like UpdateTimes. The function will be called when the output or scrap quantity is entered in the output journal and it should then calculate the setup and run time for the journal line based on the expected values in the production order routing. The below code is kind of self-explained; it grabs the production order routing line record and calculates the run time by multiplying the run time from the routing by the output plus the scrap quantity. The setup time is entered if there are no other transaction on the operation, if there is then it is zero (the concept with a setup time is that is supposed to be only once per production order). There is also a way to turn the calculation on/off through a new field in the manufacturing setup table, I always do modifications so they can exists together with how the standard functionality works (if you for example have additional companies in the same database that don’t want to use it this way).

Code-To-Calculate-Setup-and-Run-Time-In-Output-Journal-Dynamics-NAV

Next you add the call to the function in the OnValidate triggers of the output quantity and scrap quantity fields like below.

OnValidate-Code-Output-Journal-Dynamics-NAV

Now when you enter the output or scrap quantity in the output or production journal the setup time and run time is automatically calculated and populated by Dynamics NAV according to the expected values. Nice! :-)

Output-Expected-Tim-Based-On-Output-Quantity-Dynamics-NAV

That was all for this post, remember to share it on social media! :-)

Olof Simren - Freelance Microsoft Dynamics NAV Expert


Parallel Routings

$
0
0

My last post about adding a field to the item tracking lines turned out to be very technical, so this time I am doing a post that is completely without any programming or changes to the application.

The topic is parallel routings in Microsoft Dynamics NAV, it is nothing new but something that I get a fair amount of questions about and someone once suggested that I should write a blog post about it. So, here it is! 🙂

Parallel routings (sometimes also referred to as parallel sequences) are used when multiple manufacturing operations/processes can or is need to be performed simultaneously by routing the material that is being worked on to multiple work centers. The reason to do this can either be to shorten the production lead time or because some of the material is need to be worked on at different work centers. The opposite is a serial routing where each operation takes place after each other (or potentially overlapping).

The two types of routings can be illustrated as below, where the boxes corresponds to operations in a routing that are carried out from left to right.

Parallel-Routing-Illustration-Dynamics-NAV

The two above options are in Dynamics NAV defined through the Type field in the header of the routing (where Serial is the default value).

Production-Routing-Type-Dynamics-NAV

When you setup a parallel routing it is important to display the two fields called Previous and Next Operation on the lines of the routing. Those two fields are used to define where the sequence is going to be split and where it is joined again.

The below example corresponds to the parallel routing in the above illustration, where the first operation (10) is a cutting operation that cuts a metal sheet into multiple parts. The parts are then separated; some goes through a plating process (20) and then an inspection (30) while other parts at the same time are going through a rolling process (40). Then in the end the parts are married in a welding process (50) and a final inspection (60). Note that where the operations are split into two we need to define the previous operation as 10 for both the parallel operations (20 and 40) and for operation 10 we need to define that the next operations are 20 and 40, this is done by listing them with a pipe (|) in between. Then where they join again you need to define the last two operations to be the previous operation (in this case 30|40 for operation 50).

Parallel-Manufacturing-Routing-Dynamics-NAV

The run time, setup time, wait time, etc. can be setup for each of the operations just like if it was a ‘regular’ serial routing (see production lead time using routings).

How you define your operation numbers are up to you, I kind of like to keep it simple and just assign numbers with an increment of 10. I have seen 20.1, 20.2, etc. for parallel operations as well, and using letters as part of the operations could also be an option.

You can obviously both use work centers and machine centers when setting up parallel routings.

The routing have to start and end with single operations, otherwise you would get an error message when you try to certify the routing.

Now we have our routing and we can test it by creating a production order, in the below example I have create a production order for 1000 pieces. I will start with refreshing it with the scheduling direction backwards (this is to me by far the most common way and also how MRP does it), the result is then according to below screenshot. Operation 20 starts right after operation 10, and operation 30 right after operation 20. Then operation 40, which should be carried out simultaneously to 20 and 30 is scheduled to end at the same time as operation 30. This creates what sometimes is referred to a ‘float’ in the beginning of operation 40.

Backward-Production-Order-Routing-Dynamics-NAV

If I then refresh it again with the scheduling direction forward you can see that operation 40 is moved to start at the same time as operation 20, this creates the ‘float’ in the end of the operation 40.

Forward-Production-Order-Routing-Dynamics-NAV

That’s all there is to it, I hope the above clarifies parallel routings in Dynamics NAV and gives an insight to how it can be setup.

During implementations I have also heard users mentioning ‘overlapped’ routings where one operation can start before the previous operation is finished. In Dynamics NAV an overlapping operation can be accomplished in both a parallel and serial routing using the Send Ahead Quantity feature (see my previous blog post about Production Lead Time using Routings for more information about the send ahead quantity). There is no special type of routing called Overlapped in Dynamics NAV.

Have a great day!

Feedback and comments are always welcome, and remember to share this post if you found it useful. 🙂

Olof Simren - Freelance Microsoft Dynamics NAV Expert

Naviona - Microsoft Dynamics NAV Partner

Return Merchandise Authorization (RMA)

$
0
0

This blog post is about the return merchandise (or material) authorization process in Microsoft Dynamics NAV, this is another topic that is more or less always discussed during Dynamics NAV implementations.

The typical scenario is that a customer calls and wants to return a product that they have purchased to get a refund, replacement product or to get it repaired. For this they need an authorization, an RMA.

So, how is this done in Dynamics NAV? The short answer is by using a sales return order, which is similar to a sales order but it goes the ‘other way’ and is received instead of shipped and creates a credit instead of a debit on the customer. That sounds easy! Well, it is a bit more involved than that, because you have to take care of the product once it is received back and make a decision about what to do with it. In a lot of cases this involves several of the departments within the organization (customer service, quality, manufacturing, purchase, accounts receivables, etc.).

The below illustration is something that could be used during implementations to explain the scope of the process.

RMA-Flow

Each of steps are described below with some tips that I hope will be useful for you.

1. Create Sales Return Order

It starts with a customer that initiates a return by requesting an authorization to send the product back, this could be a phone call (either friendly or angry 🙂 ) or an e-mail. In Dynamics NAV you then create a new sales return order which will give you the RMA number that should be used by the customer to return the product. To make it clear I normally recommend to setup the number series for sales return orders to ‘RMA-00001’ (or something similar) since the term RMA is more known than the sales return order term (I love prefix on number series by the way). On the printout of the sales return order that is sent to the customer; call it Return Authorization instead of Sales Return Order (less confusing for the customer this way).

Sales-Return-Order-Header-Dynamics-NAV

When entering the line(s) there are two thing to consider; (1) what location code it should be returned to and (2) the return reason code.

The location code should be a separate dedicated return location, this way you are not mixing returned products with your regular inventory and if you run any type of planning or MRP then the product being returned are not considered supply that nets the demand. If your regular location is called ‘BLUE’ then create a return location called ‘BLUE-RET’ (as an example). This location can also be refereed to as quarantine, quality control, on hold, etc. and could also be used for setting aside products that you don’t want to show up as available in the availability logic.

Sales-Return-Order-Line-Dynamics-NAV

The other effect of having separate return location is that you can setup a separate inventory account where the value of returned products are posted to in the balance sheet.

Note that bringing the inventory back into a separate location does not work that well with the exact cost reversing feature that Dynamics NAV has since it want you to get the product back into inventory with the same cost as it was shipped by linking the two transactions (the original shipment and the return) and this requires them to be on the same location. My preference is to have this feature turned off and train the users to be good enough to understand when to select the apply-from entry no. (e.g. when making corrections to postings) and when it is not needed (and how the costing works on return orders).

The return reason code should indicate the reason why the customer wants to return it, which is not always the reason the sale failed. This is a mandatory field and you can setup as many codes as you want. Note that there are some additional options that you can configure for each of the codes, one of the options being if the returned product should have zero inventory value, you should know that this option does not work with standard cost items.

Return-Reason-Codes-Dynamics-NAV

It is good to know that this list of return reason codes are shared between the sales return orders and the purchase return orders (just something to think about when you define the list).

For the amount you should enter what you expect to credit the customer, this value can be changed later (if you for example reserve the rights to inspect the returned product before you decide what to credit the customer or if the freight should be deducted, etc.).

Once the sales return order is entered it gets released and the printout is send to the customer for them to include it with the products being returned (I normally add text like ‘return a copy of this page with the product’ on the printout, this makes it easy when it comes to receiving and finding the right order to receive).

The receiving process when the product shows up is the same as for other types of orders that are received (purchase & transfer orders). Note that the different options for receiving are configured by location, so having a separate receiving location also allows you to have a different receiving process if required. If you are using warehouse receipts (my favorite configuration) then the just receiver need to choose between the two locations depending on if it is a return or a regular purchase that is received.

2. Return Decision

When the product have been received there is typically an inspection taking place and based upon that a decision about what to do with the product is made (I refer to this as a return decision). It can either (a) be subject for rework, (c) be returned to regular stock, (c) send back to the customer again (popular for the customer 🙂 ), (d) be scrapped or (e) be returned to the vendor.

Note that Dynamics NAV does not natively have a quality control module, but there are a handful to choose from (Naviona sells one as well) that could be used to capture the result of an inspection and the determined fault reason. The other option is to use a separate quality control software (or a good old Excel spreadsheet).

Depending on what decision that is made the next steps in Dynamics NAV are obviously different (see flow chart above).

3. Create Rework Production Order

If the returned product needs rework (e.g. need to be fixed) then a rework production order should be created. The best way of doing this is to create a production order manually for the returned product on the return location and then go to the components and exchange them against the returned item and add any components that are needed for the rework. The components needed should then come from the regular inventory. In the below example a bicycle have been returned by the customer and the rework involves replacing the lamp, so the returned bicycle becomes a component that is consumed from the return location and the lamp becomes another component that is consumed from the regular location. The output of the production order is a bicycle as well that goes into the return location.

Rework-Production-Order-Dynamics-NAV

Also the routing needs to be altered to reflect how it is going to be reworked/fixed. To simplify this you could have a separate generic rework routing created (that includes something like a rework work center with some costs attached, which all can be changed on an order by order basis). What you do then is just to replace the routing no. on the line and refresh the production order and only calculate the routing.

Rework-Routing-Dynamics-NAV

In a FIFO environment the finished product of a production order like above will have the cost of the returned product plus the additional components plus any of the rework operations capacity costs. In a standard cost environment the finished product will have the same cost as the original finished product and any additional components or rework costs will be a variance posted into the P&L (note that the cost of the bicycle component will be considered material cost even though there is a labor and overhead portion in it).

Once done you release the production order and it is completed like you complete your regular production orders. The output of the finished product will go into the return location from where it can be shipped back to the customer.

Note that if you are handling a make to order or configure to order type of product then the sales order is maybe needed to be created before the production order (if it requires a configuration on the sales order or a link between the sales order and production order).

4. Create and Post Reclass. Journal

If the product that is returned from the customer is a good product then it could potentially be returned to the regular stock. This can be done with an entry in the reclassification journal to move it from the return location to the regular location. If you are using directed-put-aways and picks (also known as advanced warehousing) then this process becomes slightly more difficult and needs transfer orders.

Item-Reclassification-Journal-Dynamics-NAV

If you are using bins then you obviously need to enter those as well.

5. Create Sales Order

If something is going to be sent back to the customer (which is common) then you need to create a sales order process it. One way of doing this is to use the feature called Create Return Related Documents that you have on the sales return order, this will create a sales order for the same customer with the same item(s) etc..

Create-Return-Related-Documents-Dynamics-NAV

The other option would be to use the Copy Documents function and from the sales order page copy the sales return order.

Copy-Documents-Dynamics-NAV

In both cases you need to be aware of the location code on the lines, if you are returning something that have been reworked (using the rework process described above) or if you are simply returning the product as it was received then you want to return it from the return location. If you are sending a replacement item or a completely different item it should be sent from the regular inventory location.

6. Create and Post Negative Adjustment

If the item returned from the customer should be scrapped then you can just do a negative adjustment in the item journal. I always recommend using the reason code when doing those types of transactions, but the fact that the adjustment is made on the return location gives you a hint on why it was done when you two years later are looking through the transaction details and wondering why you made the adjustment.

You can also use a separate general business posting group if you want the cost of the product to be posted against a specific general ledger account (and/or a use a dimension to separate different types of adjustments from each other).

Item-Journal-Dynamics-NAV

7. Create Purchase Return Order

If the item returned from the customer is a purchased part then it should potentially be returned to the vendor. The Create Return Related Documents feature at the sales return order page can also be used to create the purchase return order to send the product back to the vendor.

Create-Return-Related-Documents-2-Dynamics-NAV

As you can see from the screenshot above, it can also create a new purchase order in addition to the purchase return order, the purpose of this is obviously if you want the vendor to send you a replacement. Kind of nice that that documents can all be created at the same time like this.

Shipping and Invoicing

The shipping process for the purchase return order and the new sales order is the same as any other shipping process that you have in Dynamics NAV. And the invoicing process is also the same. One thing to be aware of when invoicing is that the invoice is applied to the credit memo.

That’s all for the RMAs, comments below are always welcome as well as sharing this post on social media using the share button below to the right. 🙂

Cheers!

Olof Simren - Freelance Microsoft Dynamics NAV Expert

Naviona - Microsoft Dynamics NAV Partner

Viewing all 17 articles
Browse latest View live